> ## Documentation Index
> Fetch the complete documentation index at: https://docs.dash360.com/llms.txt
> Use this file to discover all available pages before exploring further.
# Saving and Sharing Reports
> Save reports, control who sees them, copy, export and import, and publish to the shared Report Repository.
# Saving and Sharing Reports
Once a report is built, the Designer gives you several ways to save it, control who can see it, and move it between environments.
This page is part of the [Report Studio](/user-guide/reporting/report-designer) guide.
## Saving a report
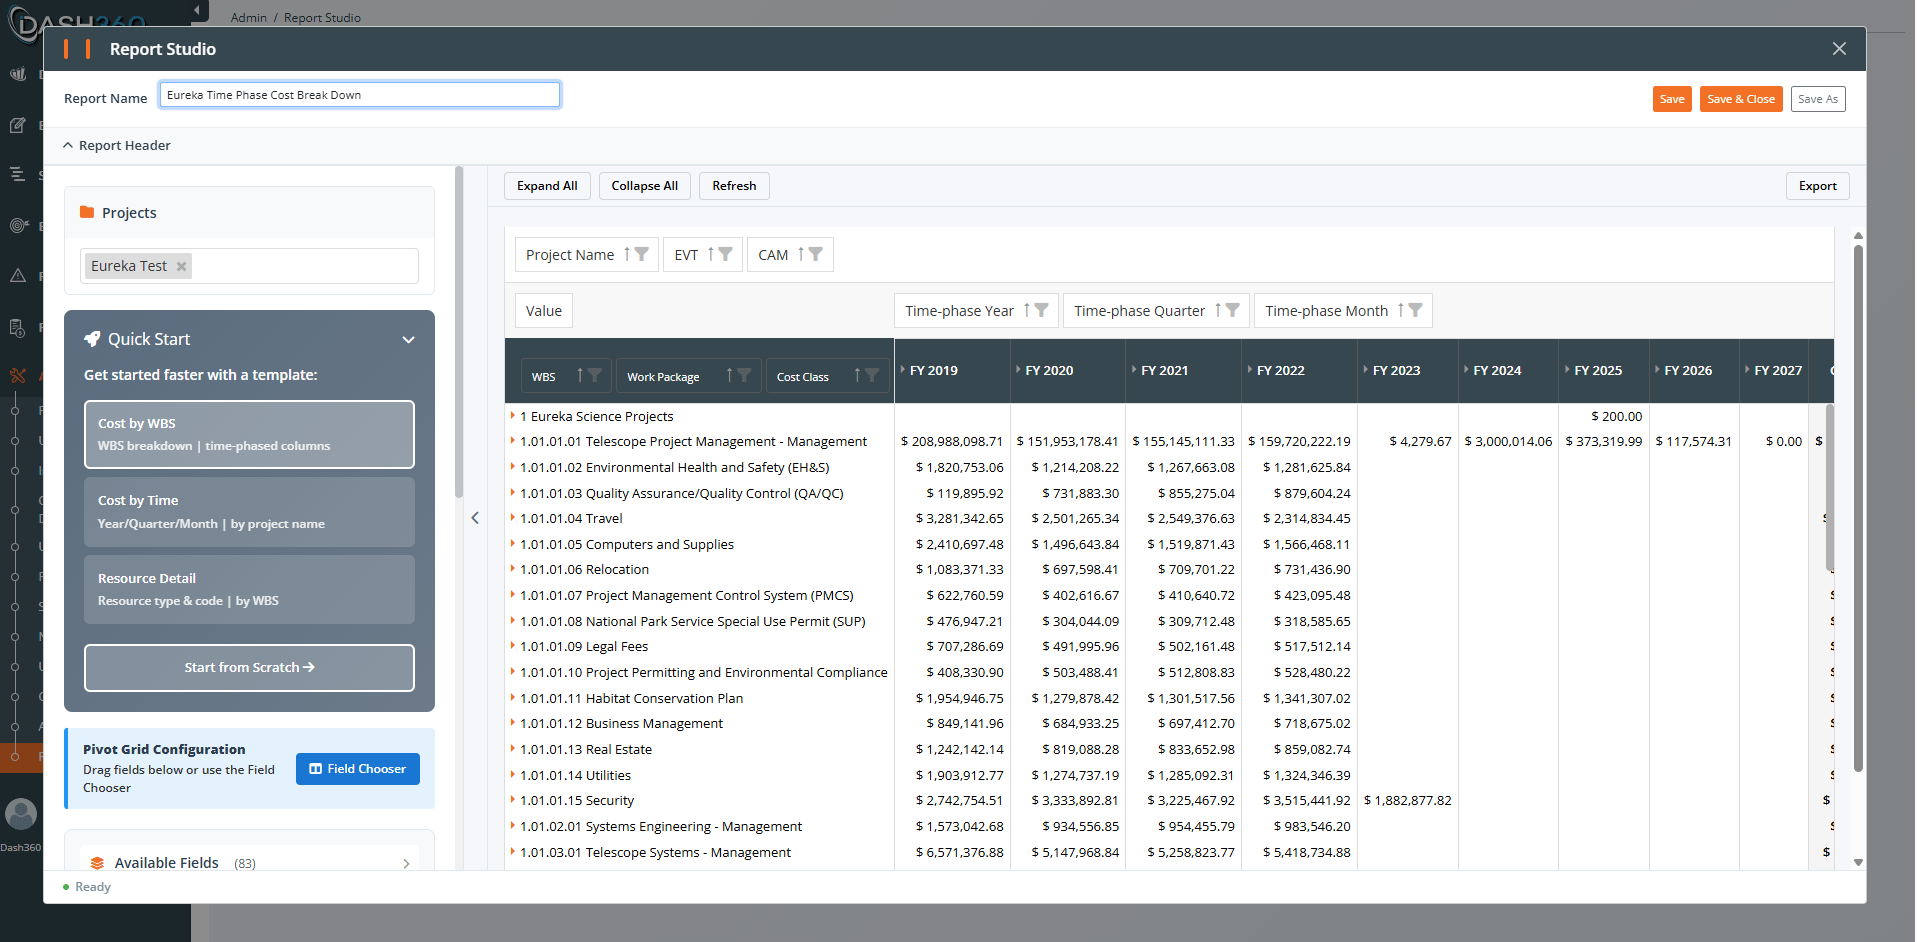
1. Click **Save** in the Designer.
2. Enter a **report name** and an optional **description**.
3. Confirm.
When you save, Dash360 also captures a **thumbnail** of the current preview automatically. That thumbnail is what appears on the landing page card, so arrange the report the way you want it to look before saving.
Saving stores the full layout: selected projects, fields, calculated fields, display settings, and header text. Reopen the report later to continue editing exactly where you left off.
 ## Copying a report
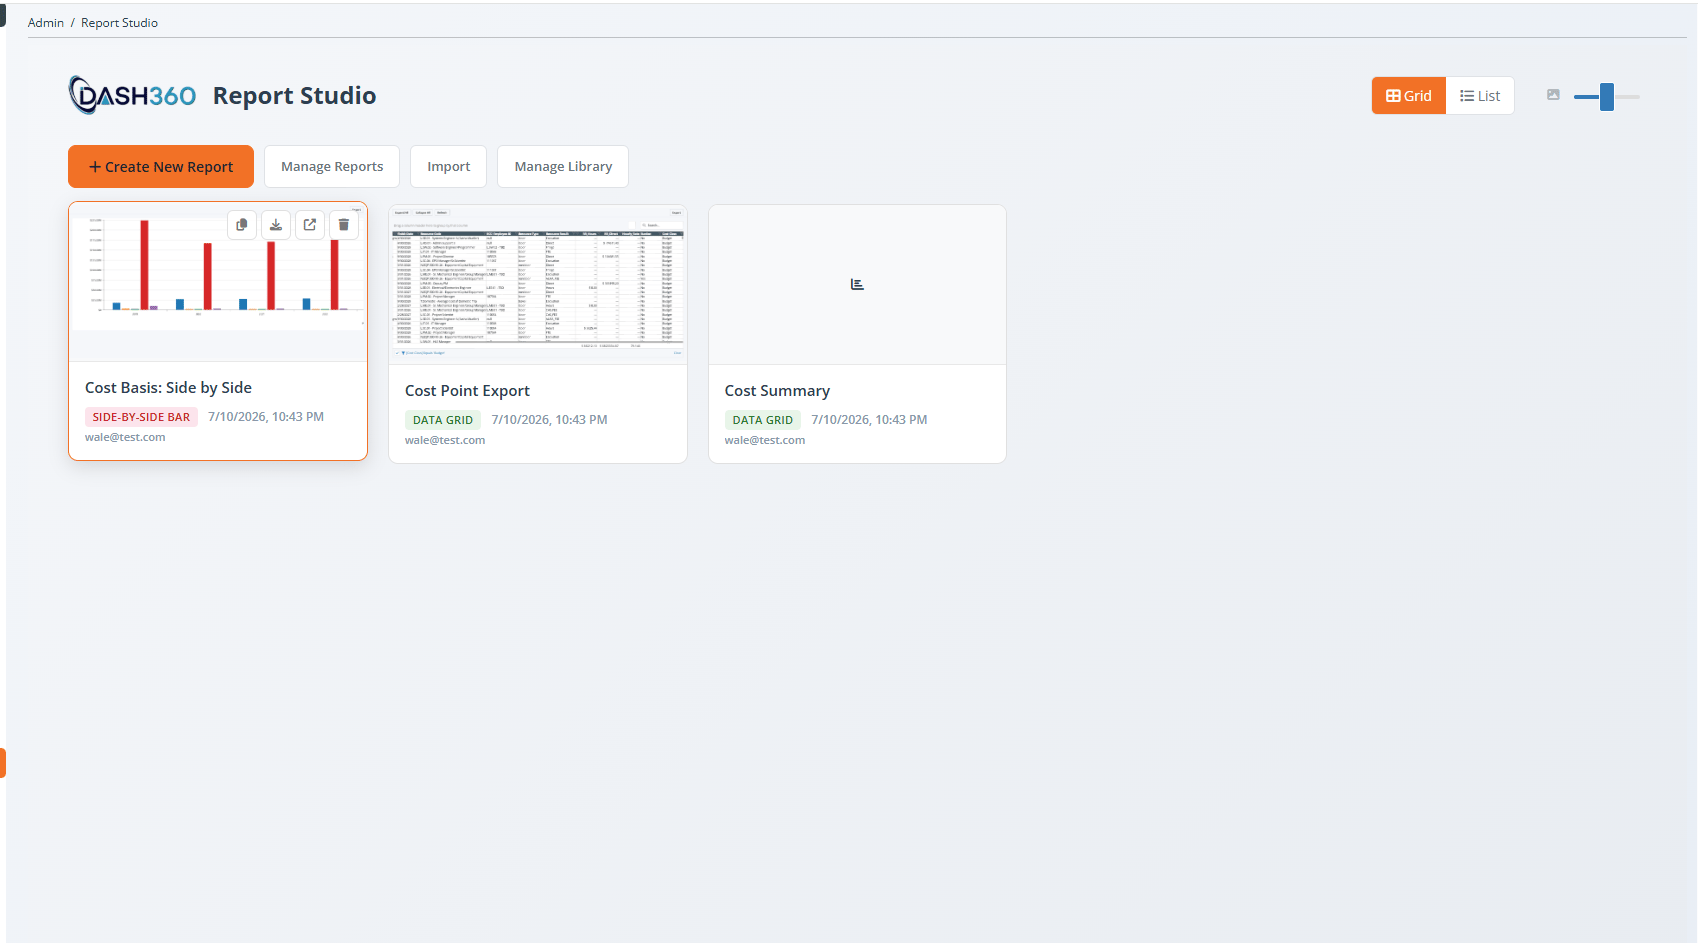
Use **Copy** (the copy icon on a report card) to duplicate a report under a new name. The copy is independent, so you can experiment or create a variation without changing the original. Copy is the safest way to build a new report that is similar to an existing one.
## Copying a report
Use **Copy** (the copy icon on a report card) to duplicate a report under a new name. The copy is independent, so you can experiment or create a variation without changing the original. Copy is the safest way to build a new report that is similar to an existing one.
 ## Managing report visibility
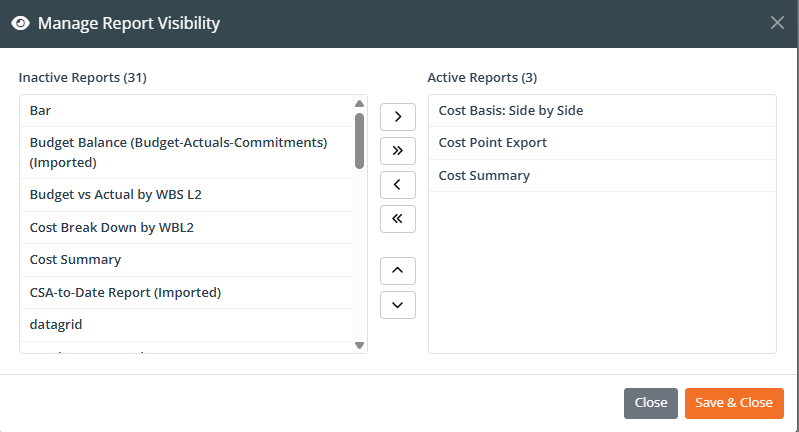
Click **Manage Reports** on the landing page to control which reports appear and in what order.
* **Active vs inactive**: Make a report inactive to hide it from the landing page and the Viewer without deleting it. Inactive reports can be reactivated at any time.
* **Display order**: Arrange the order in which reports appear.
This is how you keep the library tidy: retire old reports by making them inactive instead of deleting them.
## Managing report visibility
Click **Manage Reports** on the landing page to control which reports appear and in what order.
* **Active vs inactive**: Make a report inactive to hide it from the landing page and the Viewer without deleting it. Inactive reports can be reactivated at any time.
* **Display order**: Arrange the order in which reports appear.
This is how you keep the library tidy: retire old reports by making them inactive instead of deleting them.
 ## Deleting a report
Use **Delete** (the trash icon on a report card) to remove a report. If you only want to hide a report temporarily, make it inactive through **Manage Reports** instead.
## Export and import
Export and import move a single report between Dash360 environments (for example, from a test environment to production), or hand a report to another team to load themselves.
### Export
Click **Export** on a report card. Dash360 downloads a report package file. The package contains the report definition and the information needed to recreate it.
### Import
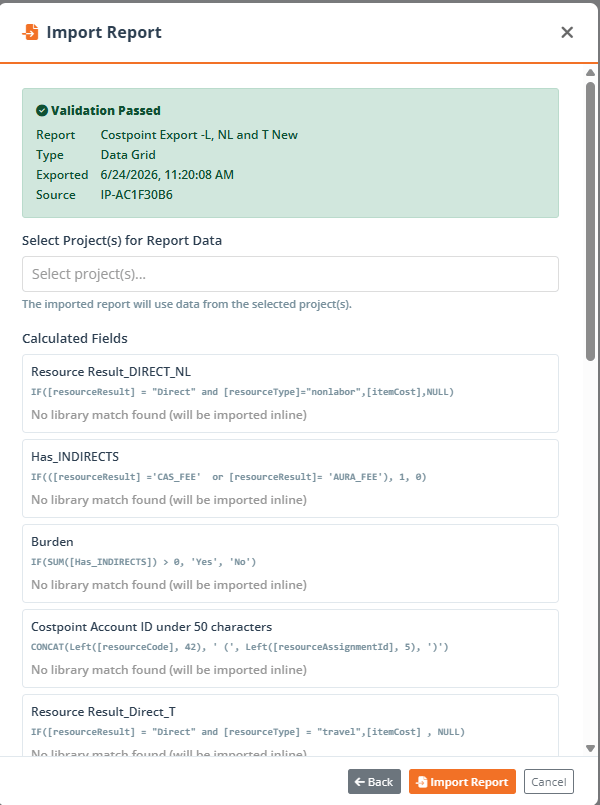
1. Click **Import** on the landing page.
2. Choose the exported report package file.
3. Dash360 validates the package and checks that the dynamic fields it uses exist in your environment.
4. Confirm to add the report to your landing page.
A report can reference dynamic fields (notebooks, codes, calendars) that are specific to a project. When you import a report, those fields must exist in the target environment for the report to work as designed. The import check warns you about anything missing.
## Deleting a report
Use **Delete** (the trash icon on a report card) to remove a report. If you only want to hide a report temporarily, make it inactive through **Manage Reports** instead.
## Export and import
Export and import move a single report between Dash360 environments (for example, from a test environment to production), or hand a report to another team to load themselves.
### Export
Click **Export** on a report card. Dash360 downloads a report package file. The package contains the report definition and the information needed to recreate it.
### Import
1. Click **Import** on the landing page.
2. Choose the exported report package file.
3. Dash360 validates the package and checks that the dynamic fields it uses exist in your environment.
4. Confirm to add the report to your landing page.
A report can reference dynamic fields (notebooks, codes, calendars) that are specific to a project. When you import a report, those fields must exist in the target environment for the report to work as designed. The import check warns you about anything missing.
 ## Publishing to the shared Report Repository
The Report Repository lets you share a report beyond your own environment so other Dash360 customers or teams can pull a copy.
| Action | What it does |
| --------------- | ------------------------------------------------------------------------------------------------- |
| **Publish** | Adds your report to the shared repository so others can pull it |
| **Push Update** | Sends your latest changes to the published copy; the landing page flags when an update is pending |
| **Refresh** | Pulls the latest published version into your local copy |
| **Unpublish** | Removes your report from the repository; copies others already pulled keep working |
These actions appear on the report card only when repository sharing is available to you.
## How users get to your report
Saved reports are available in the read-only **Report Gallery**. There are two easy ways to reach a report:
* From the Designer landing page, click the **Open in Viewer** icon on a report card.
* Share the Viewer link with users: `/Reporting/CetpReportViewer?reportId=`.
What each user sees in the Viewer is limited by their Work Package permissions, so the same report can show different rows to different people. See [Report Gallery](/user-guide/reporting/reports-viewer) for how users run and filter reports.
## Where to go next
Run, filter, save views, and export finished reports.
Pick fields and build calculated fields.
## Publishing to the shared Report Repository
The Report Repository lets you share a report beyond your own environment so other Dash360 customers or teams can pull a copy.
| Action | What it does |
| --------------- | ------------------------------------------------------------------------------------------------- |
| **Publish** | Adds your report to the shared repository so others can pull it |
| **Push Update** | Sends your latest changes to the published copy; the landing page flags when an update is pending |
| **Refresh** | Pulls the latest published version into your local copy |
| **Unpublish** | Removes your report from the repository; copies others already pulled keep working |
These actions appear on the report card only when repository sharing is available to you.
## How users get to your report
Saved reports are available in the read-only **Report Gallery**. There are two easy ways to reach a report:
* From the Designer landing page, click the **Open in Viewer** icon on a report card.
* Share the Viewer link with users: `/Reporting/CetpReportViewer?reportId=`.
What each user sees in the Viewer is limited by their Work Package permissions, so the same report can show different rows to different people. See [Report Gallery](/user-guide/reporting/reports-viewer) for how users run and filter reports.
## Where to go next
Run, filter, save views, and export finished reports.
Pick fields and build calculated fields.