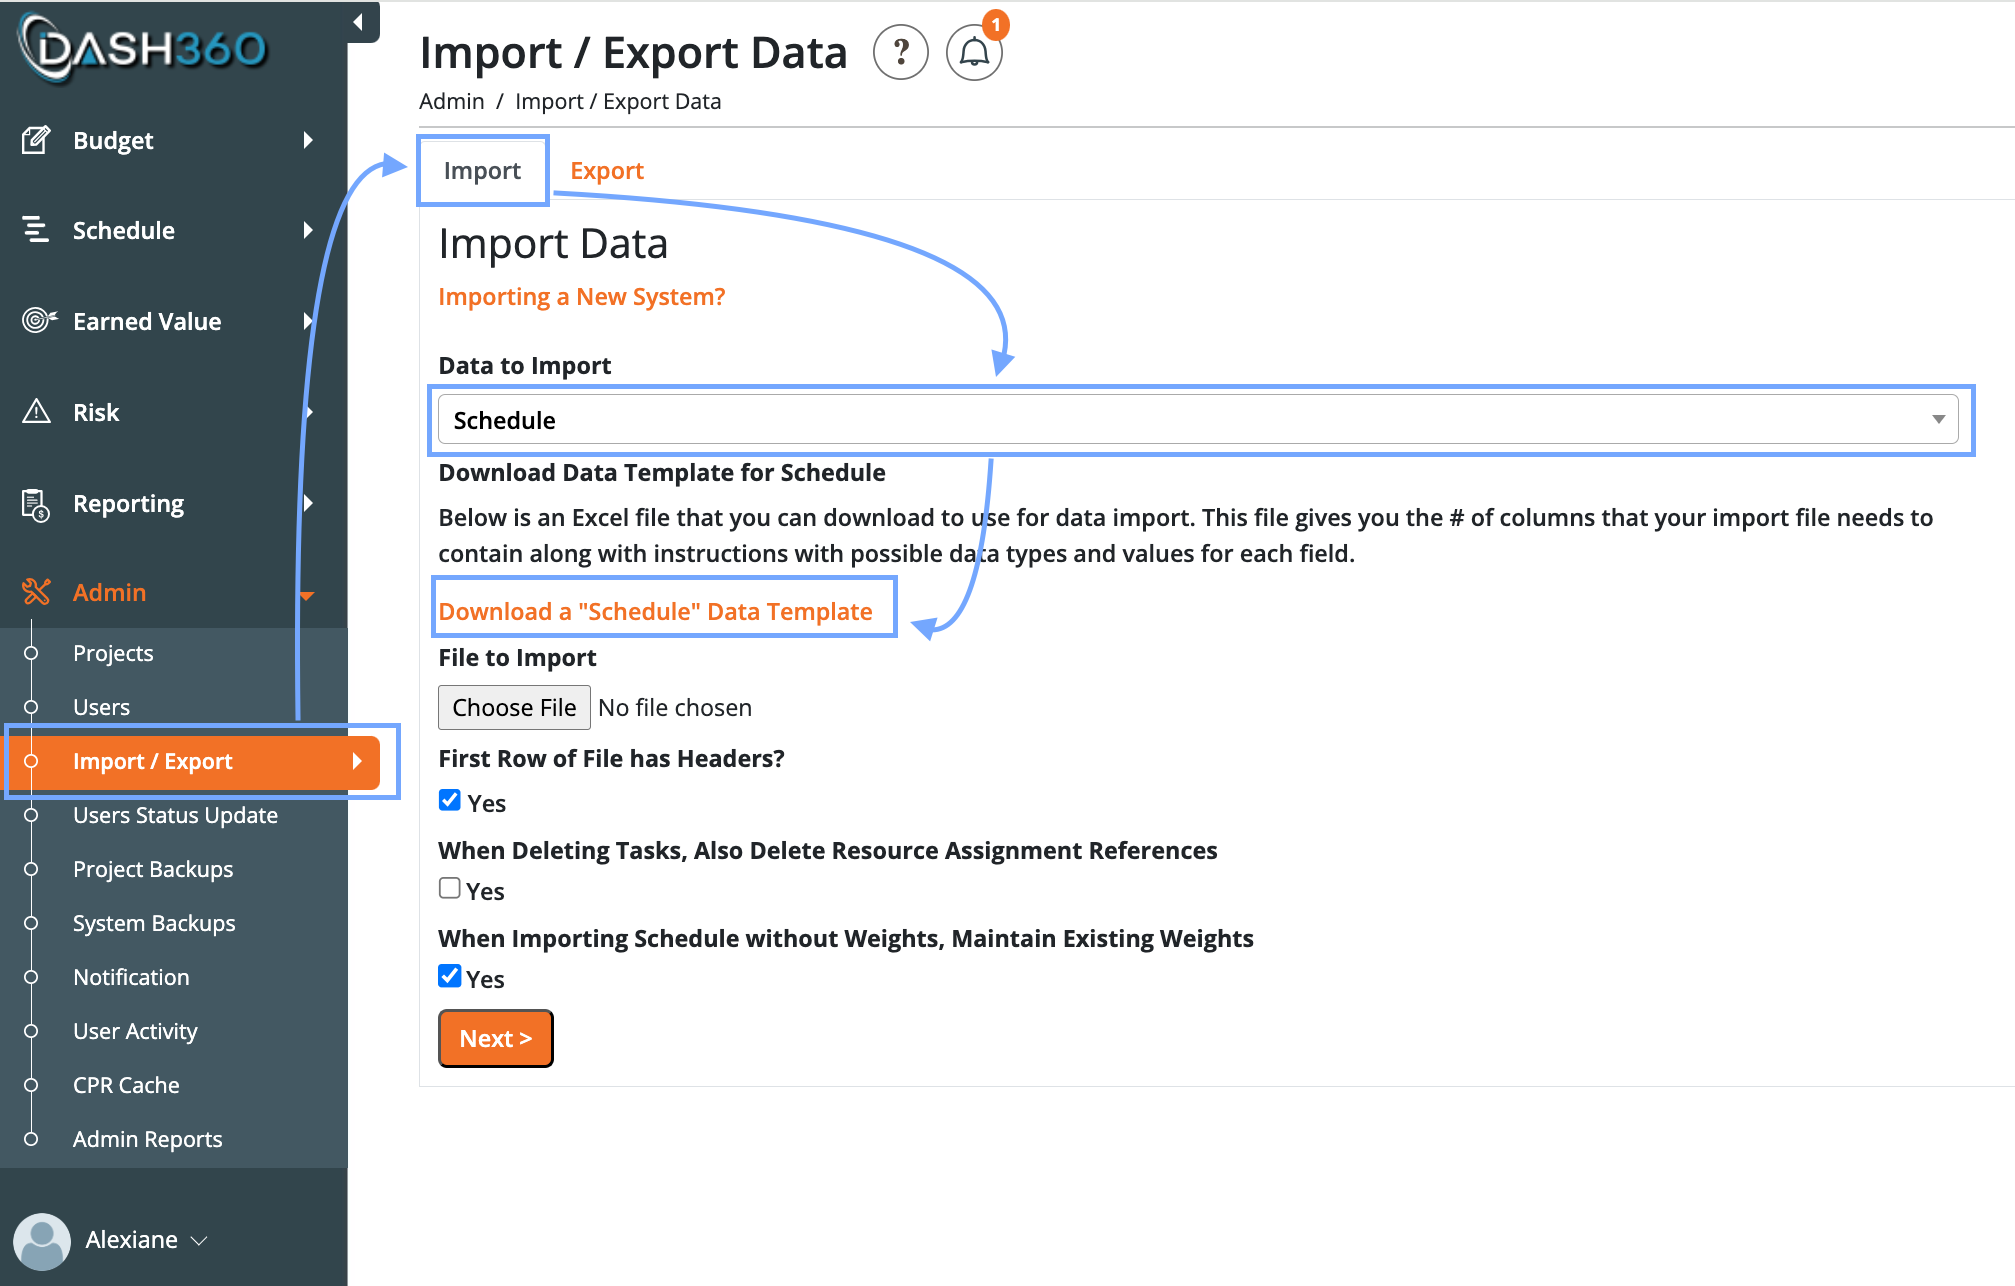
- Download the Schedule Template:
- In the Admin Module, go to Imports and download the Schedule Template.
- Make sure this sheet is named “DATA”. This is the required name for a successful upload to Dash360. It is where you will organize and enter all your schedule information for import into Dash360.
- Export your schedule to an Excel file from your scheduling tool, such as Microsoft Project, Primavera P6, or another platform. Clean the exported file to ensure it can be easily transferred to the ‘DATA’ sheet for uploading to Dash360:
- Clean the WBS Code to match the Dash360 WBS code format (e.g., 1.01.03.02.01.01).
- Ensure the Physical % Complete column is formatted as a number between 0 and 100, not as a percentage (e.g., convert 70% to 70).
-
Reformat all Date Fields and apply the following formatting steps to: Start & Finish, Previous Month Start & Finish, Baseline Start & Finish.
- Ensure all entries are in date format not text format. Change all to MM/DD/YY format (e.g., 10/01/24). Optionally include time (should default to 0:00).
- Standardize Activity Type.
- Change Activity Type to either “Task” or “Milestone”.
- Combine all sheets into a single Excel workbook:
- Right-click the tab(s) you want to move and select Move or Copy__, consolidating the sheets into the same workbook.
- Every activity whether it is a milestone or not needs to have a start and finish date, even activities with 0 duration.
- Blanks in Start/Finish typically indicate milestones with 0 duration.
- Best practice: Insert a new column to the right before converting formats.
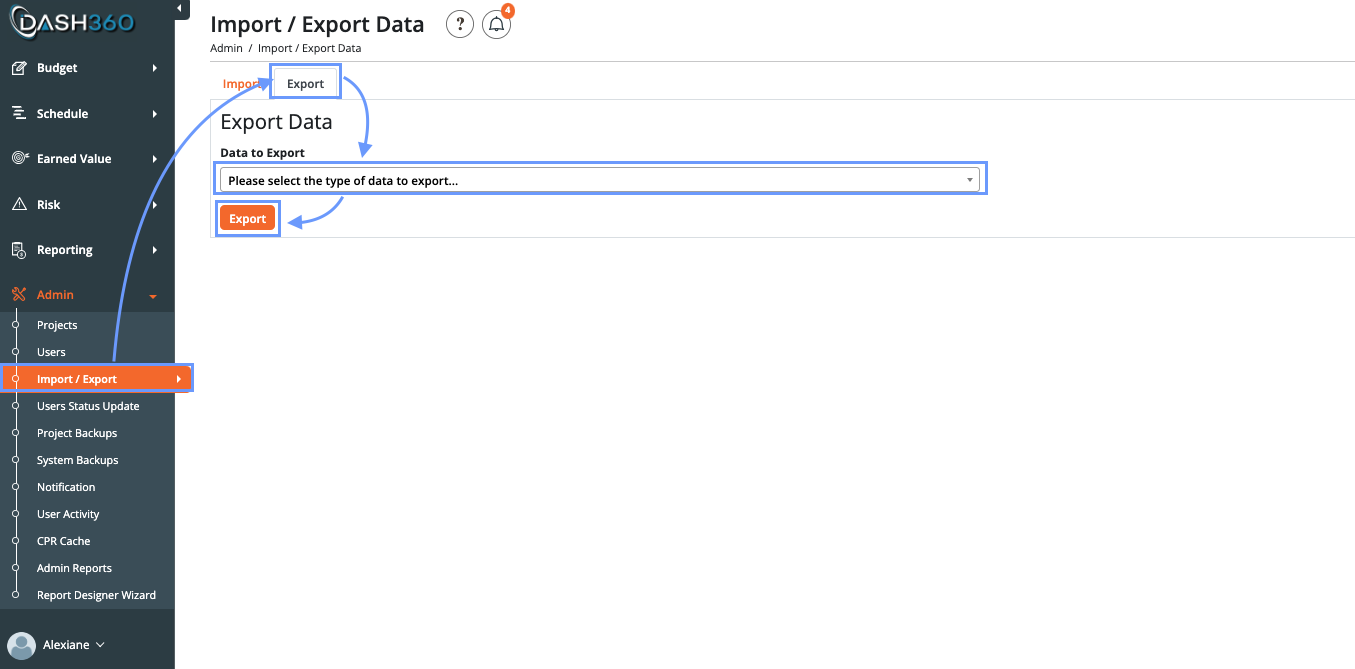
- Export Cost Estimates from Dash360:
- Navigate to the Admin Module -> Import/Exports, then export the Cost Estimates sheet.
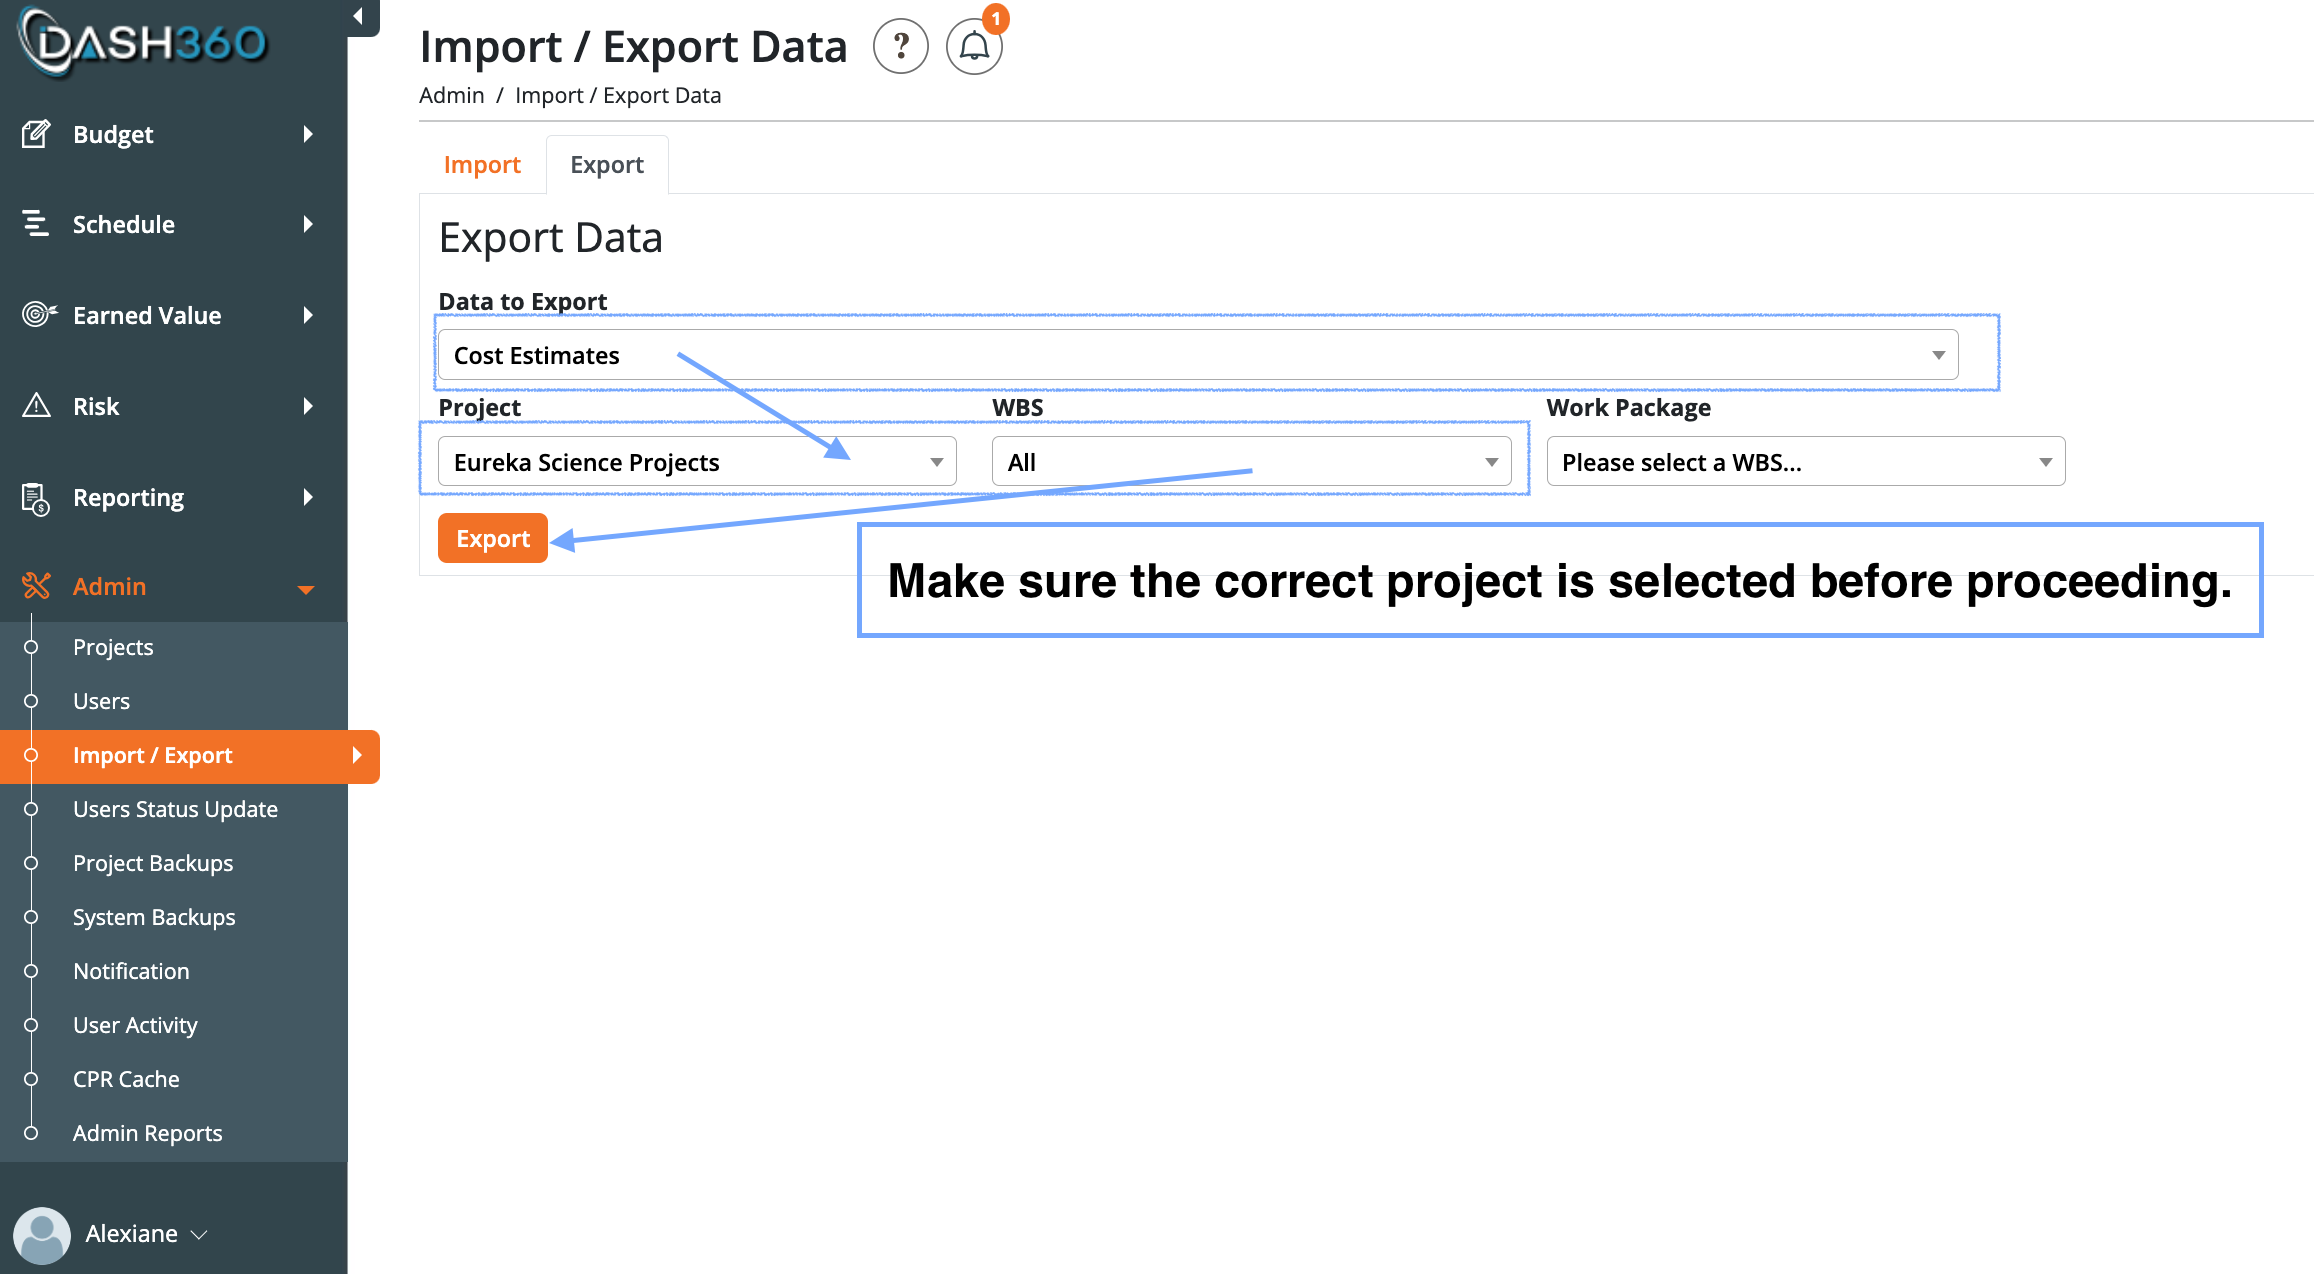
- Make sure to select the correct project and WBS ( can select all the WBS or a specific area of the project).
- Do not alter the exported cost estimate data. Only rename the sheet from Data to Cost Estimates.
- It is recommended to apply filters to all columns in each sheet.
- Begin Mapping Data
- Copy & Paste Only Activity IDs
- Copy the Activity ID column from the schedule export sheet into the Data sheet. This is the only field you should manually copy-paste. Use XLOOKUP (preferred) or VLOOKUP for everything else.
- Map Fields via Lookup Functions (VLOOKUP & XLOOKUP):
- Use Activity ID to find the Work Package # on the Schedule Export.
- Then use Work Package # to lookup the following fields in Cost Estimates:
- Work Package Name.
- WBS #.
- WBS Name.
- Use the Activity ID to lookup schedule fields (dates, activity type, etc.) from the Schedule Export.
- Delete the template examples in the first rows from the Data sheet to avoid importing that information or write ‘Yes’ in the delete column. The delete column is necessary to fill out as it will indicate to Dash360 if an activity is to be uploaded or deleted during uploading process.
- Fill this column out with ‘Yes” to delete or ‘No”.
- Make sure to include the correct project name.
- All column fields are recommended to be filled out, however do not need to be if data is not available.
- Final Steps: Save and Import
- Ensure the Data sheet (schedule template) is named exactly DATA as this is the sheet you want uploaded to Dash360.
- Save your workbook.
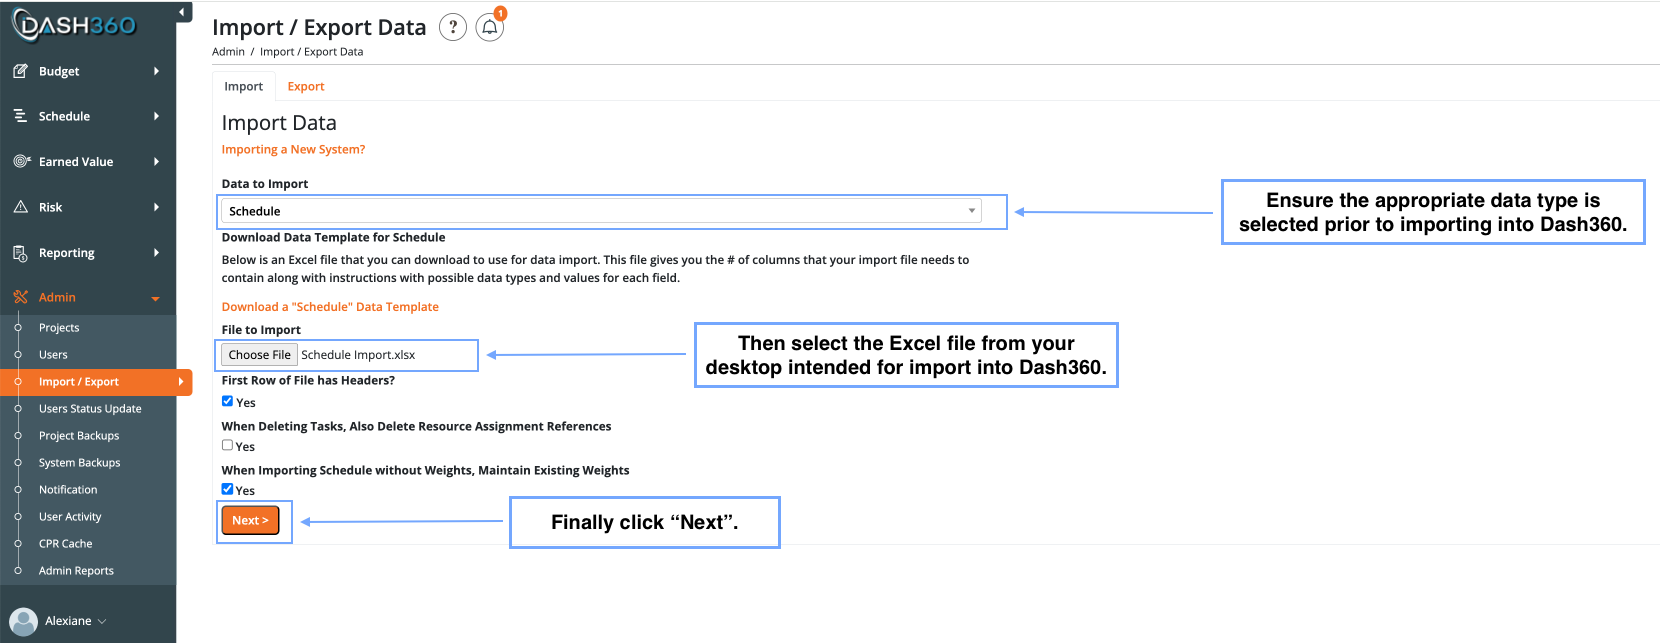
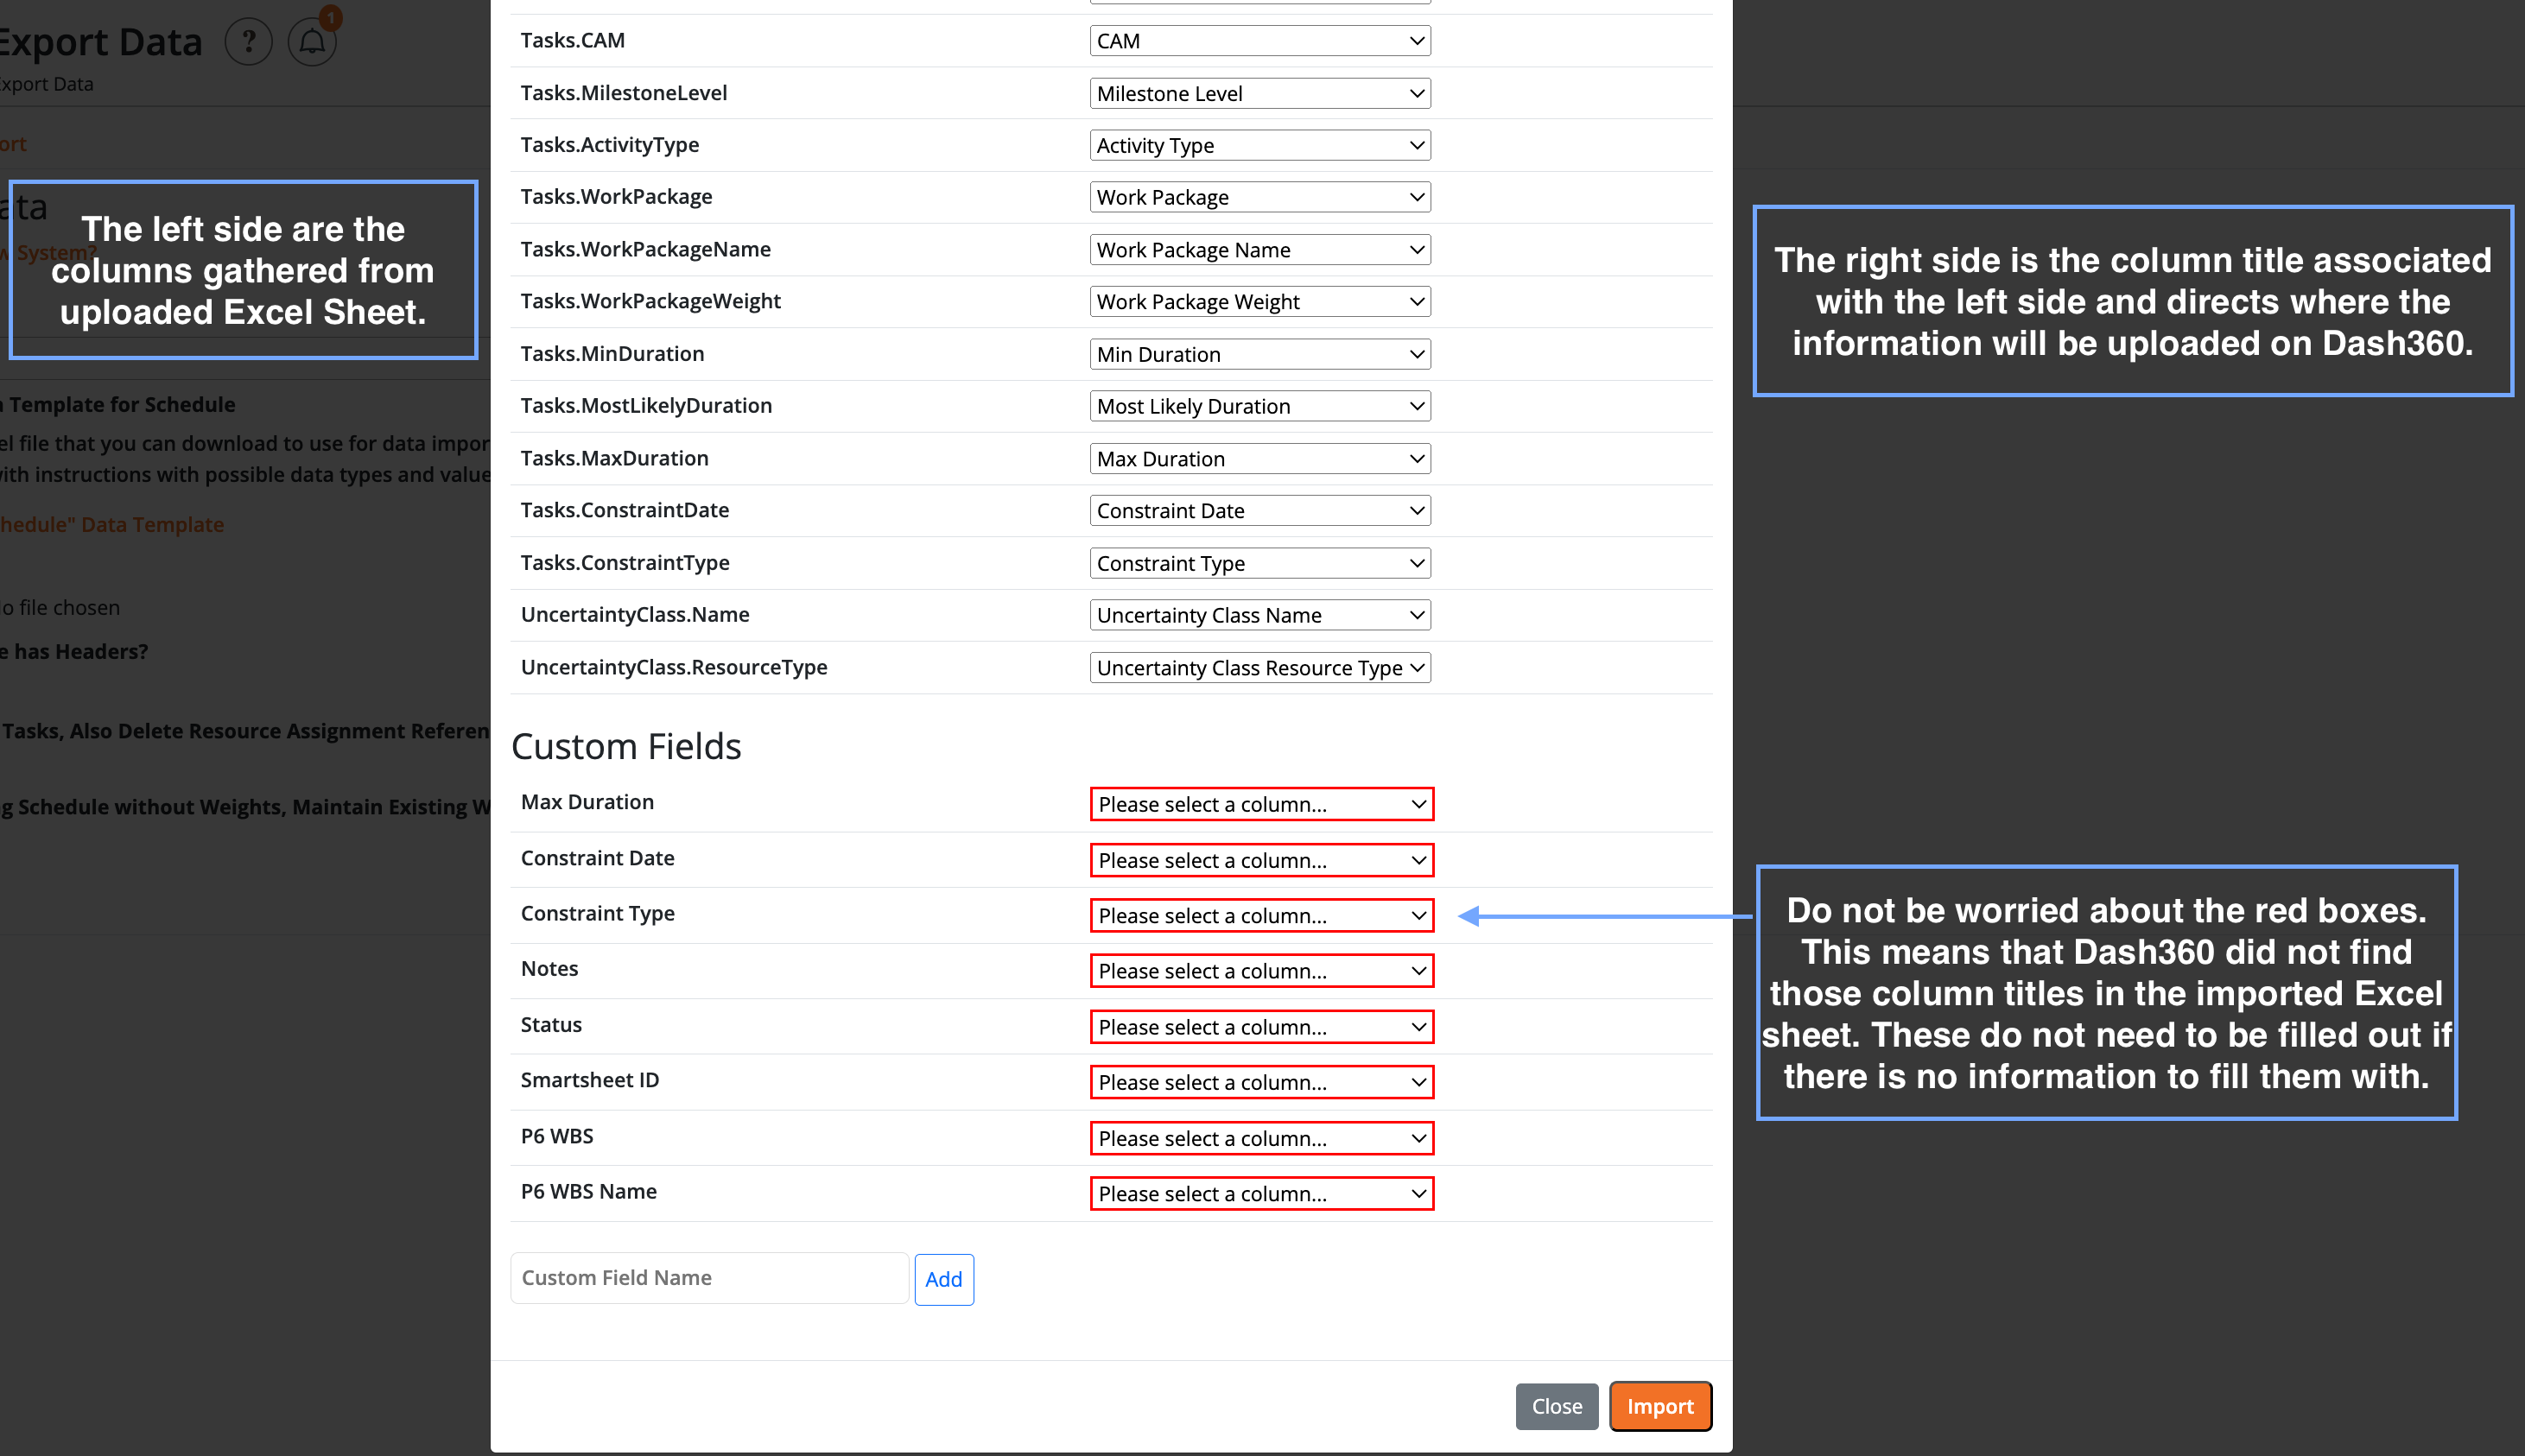
- Return to the Dash360 Admin Module, go to Import/Export -> Schedule Import, and upload your file. Verify all columns are correctly mapped during upload.
- Check all the boxes before clicking next to verify upload is correct.
- Work Packages are the most stable organizing structure—rely on them for consistency.
- Once a schedule has been successfully imported, you do not need to start over each time.
- WBS Names with N/A: These were previously excluded due to missing cost estimates; this issue has been resolved.
- If you encounter issues, a red box will appear after selecting Import in the previous step:
- Missing WP-WBS Link: Go to the Budget Form, locate the WBS, click the process wheel, and assign an existing Work Package Code.
- Missing WP Code: Create a new one under the Admin Module -> Projects -> Select your project -> Codes -> Scroll to bottom to add.
- Mismatched WBS #: Choose a consistent WBS # and update it across Excel and Dash360.
- Use filters and lookup functions to isolate and resolve issues efficiently.