- Work Package Level
- Resource Assignments.
- Risk Register.
- Add a new Notebook Category:
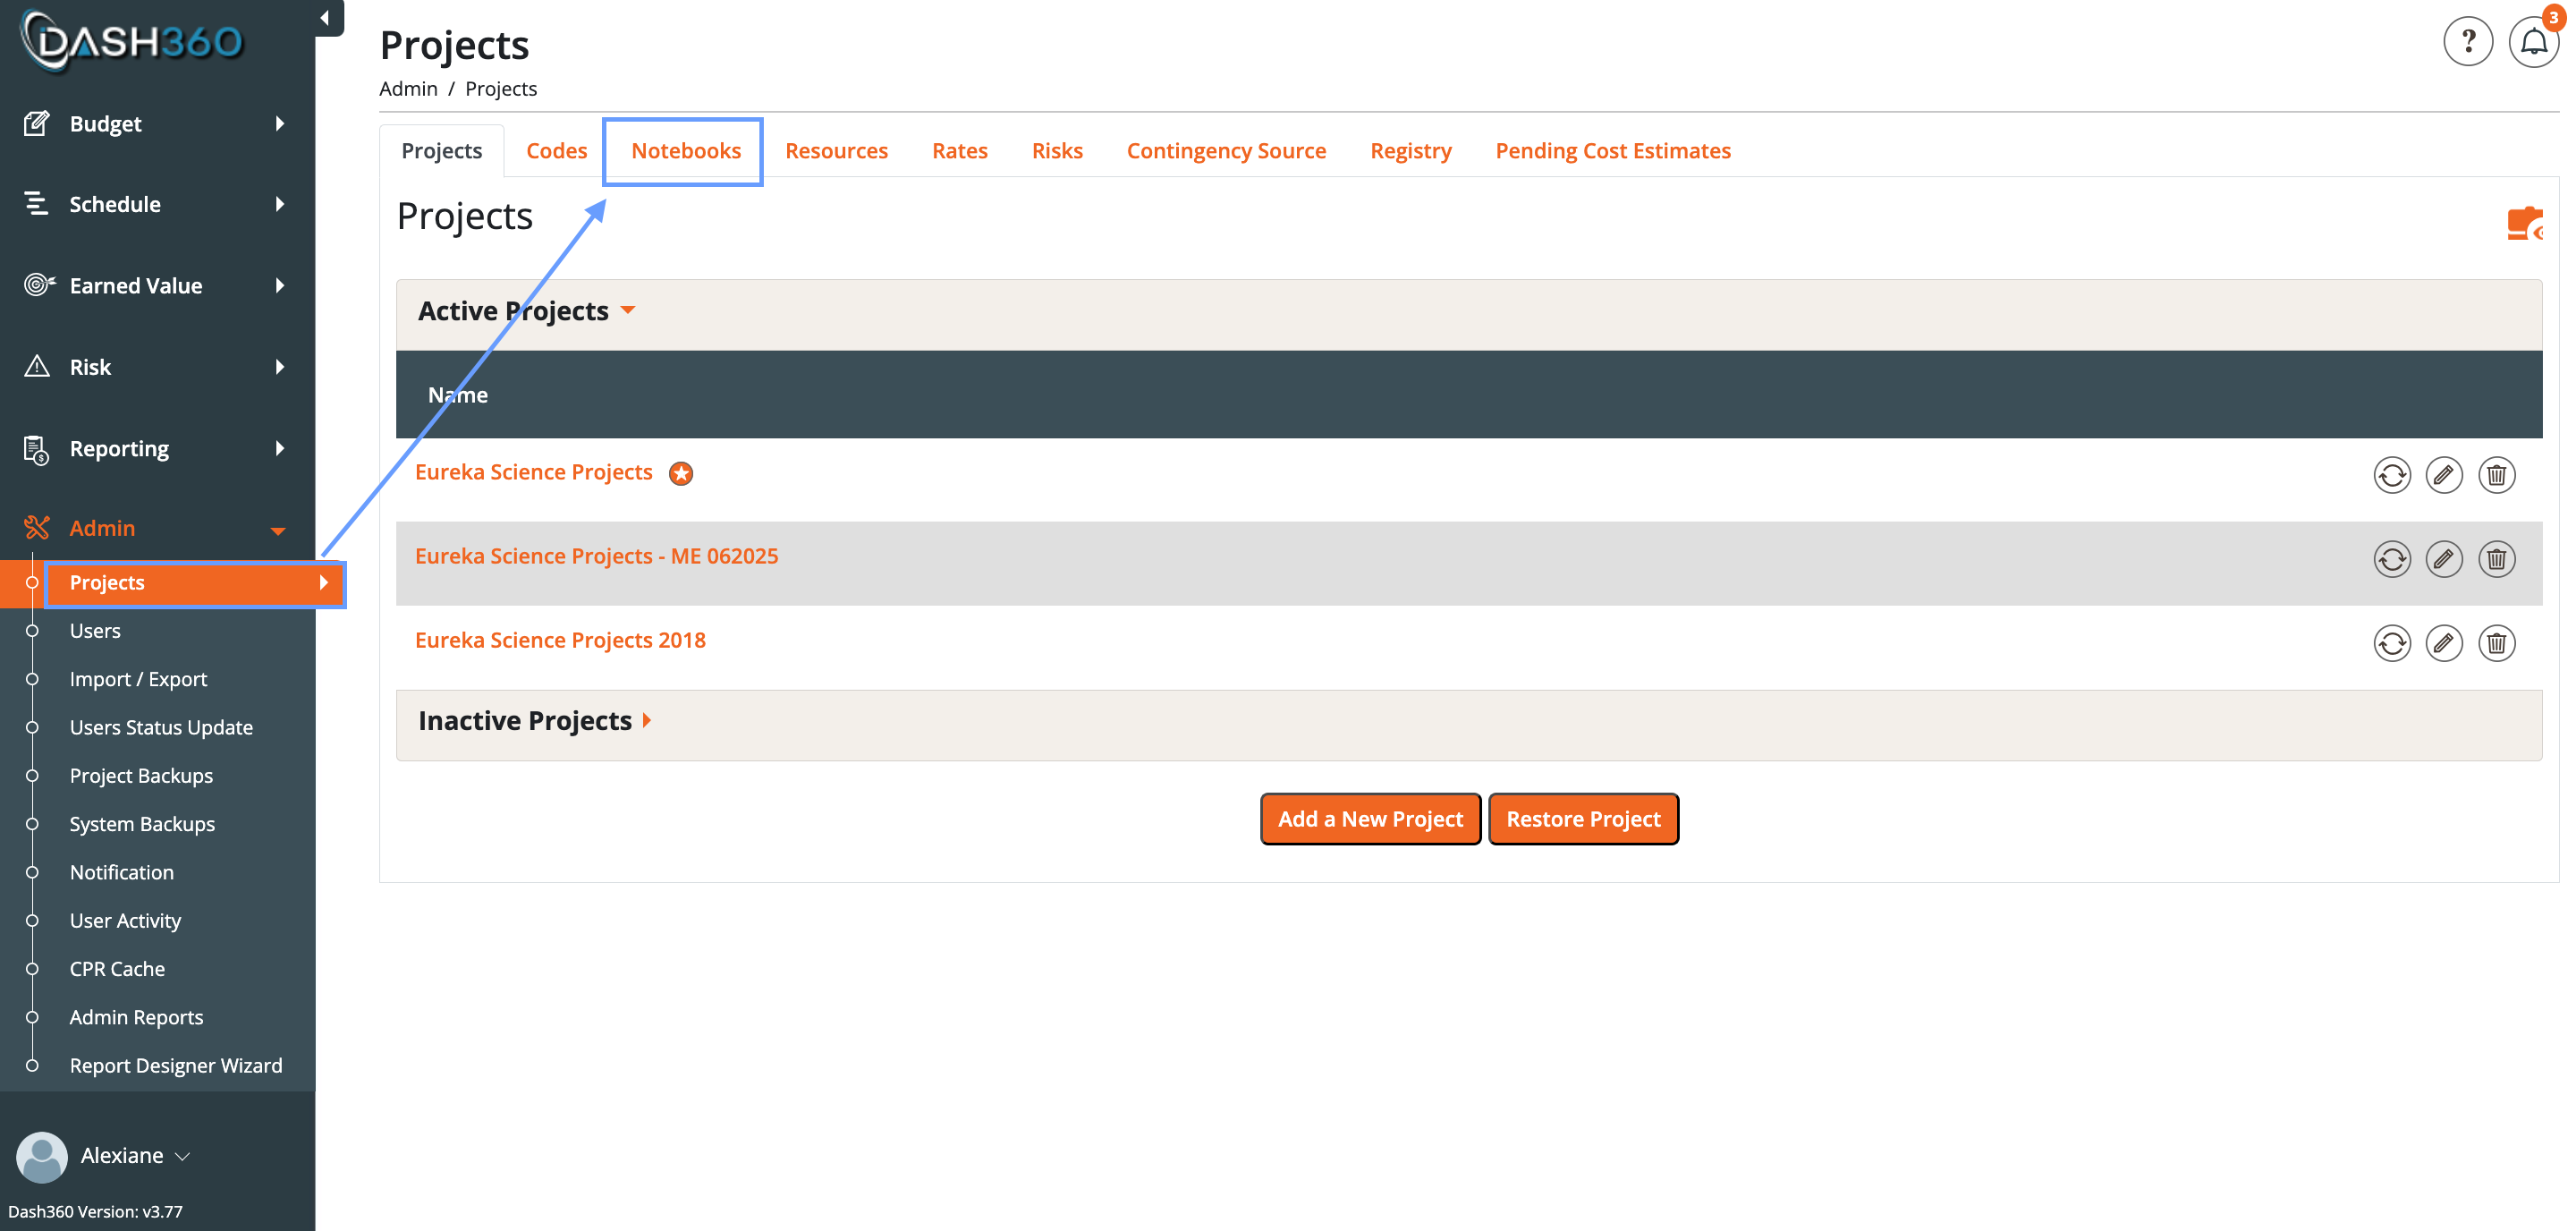
- Go to Admin -> Projects -> Notebooks section.
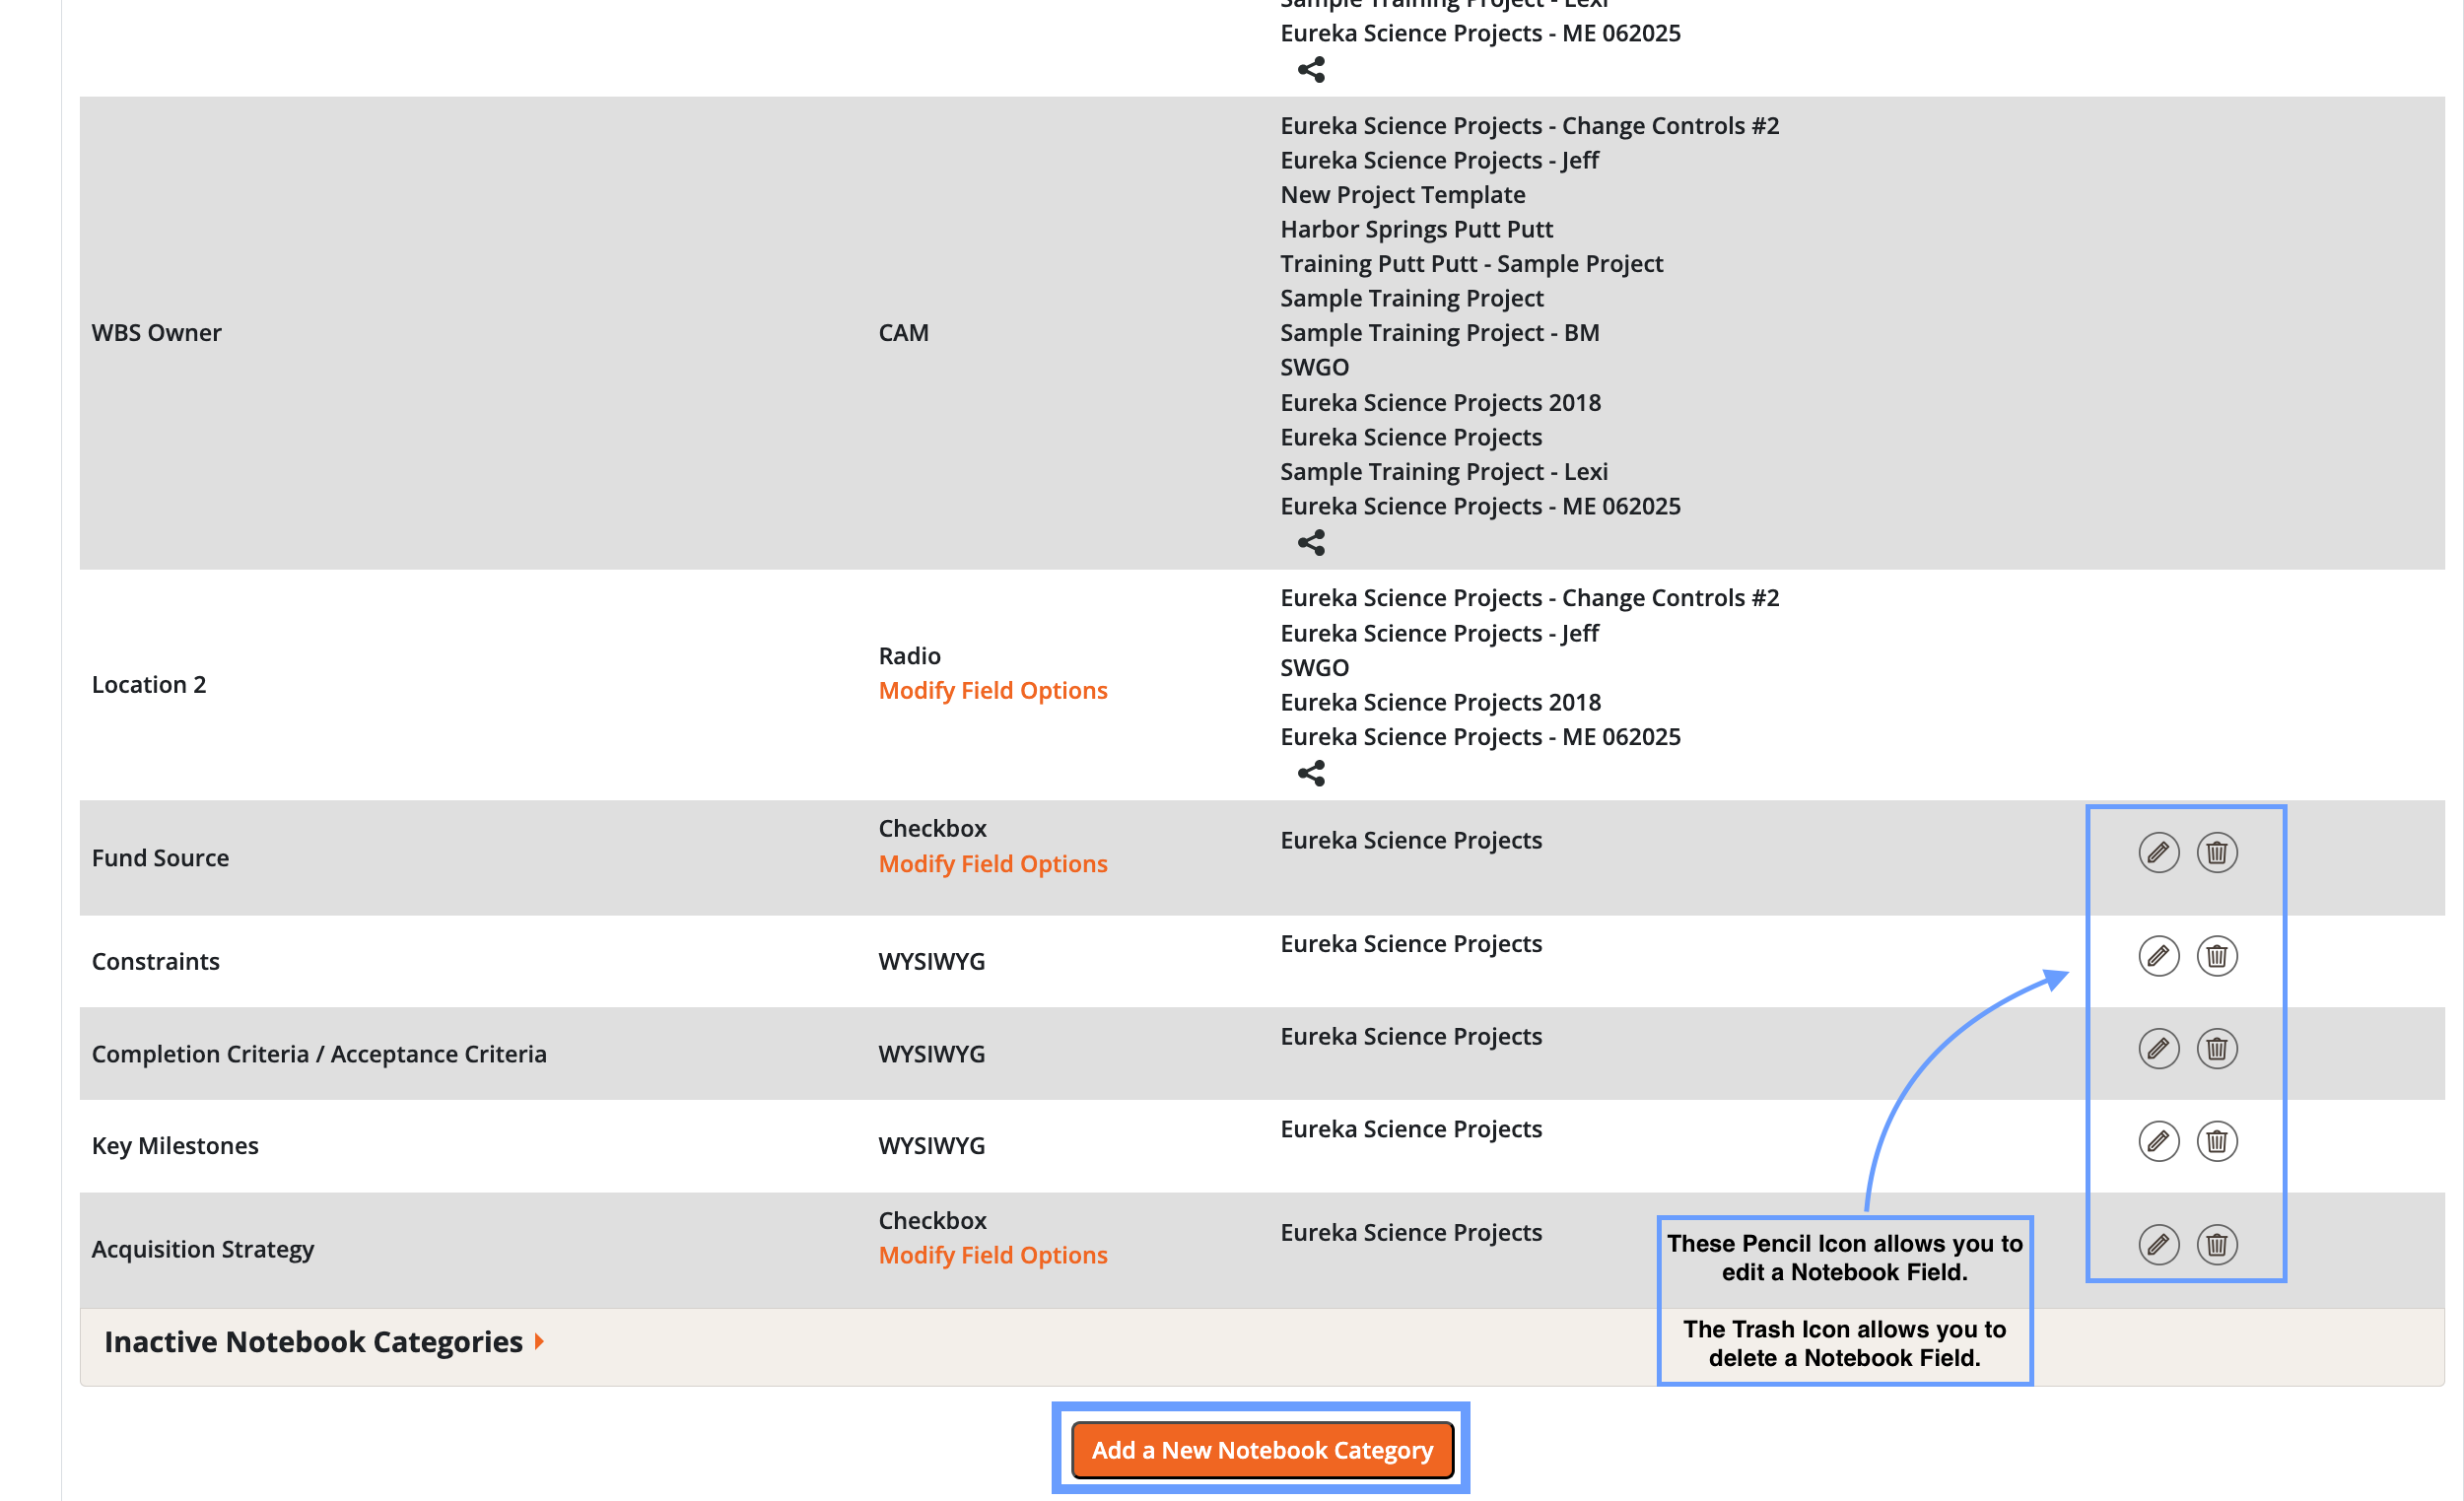
- Scroll down and select Add New Notebook Category.
- If you do not assign it to a project, it will remain inactive and will not appear in the project.
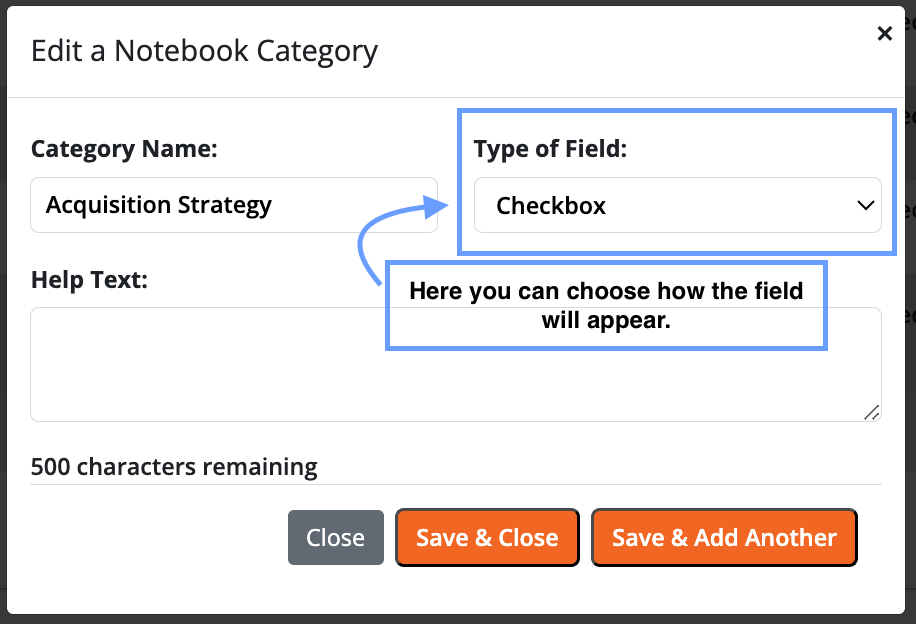
- Set Display Options:
- Within the category settings (Pencil Icon), choose how the field will appear.
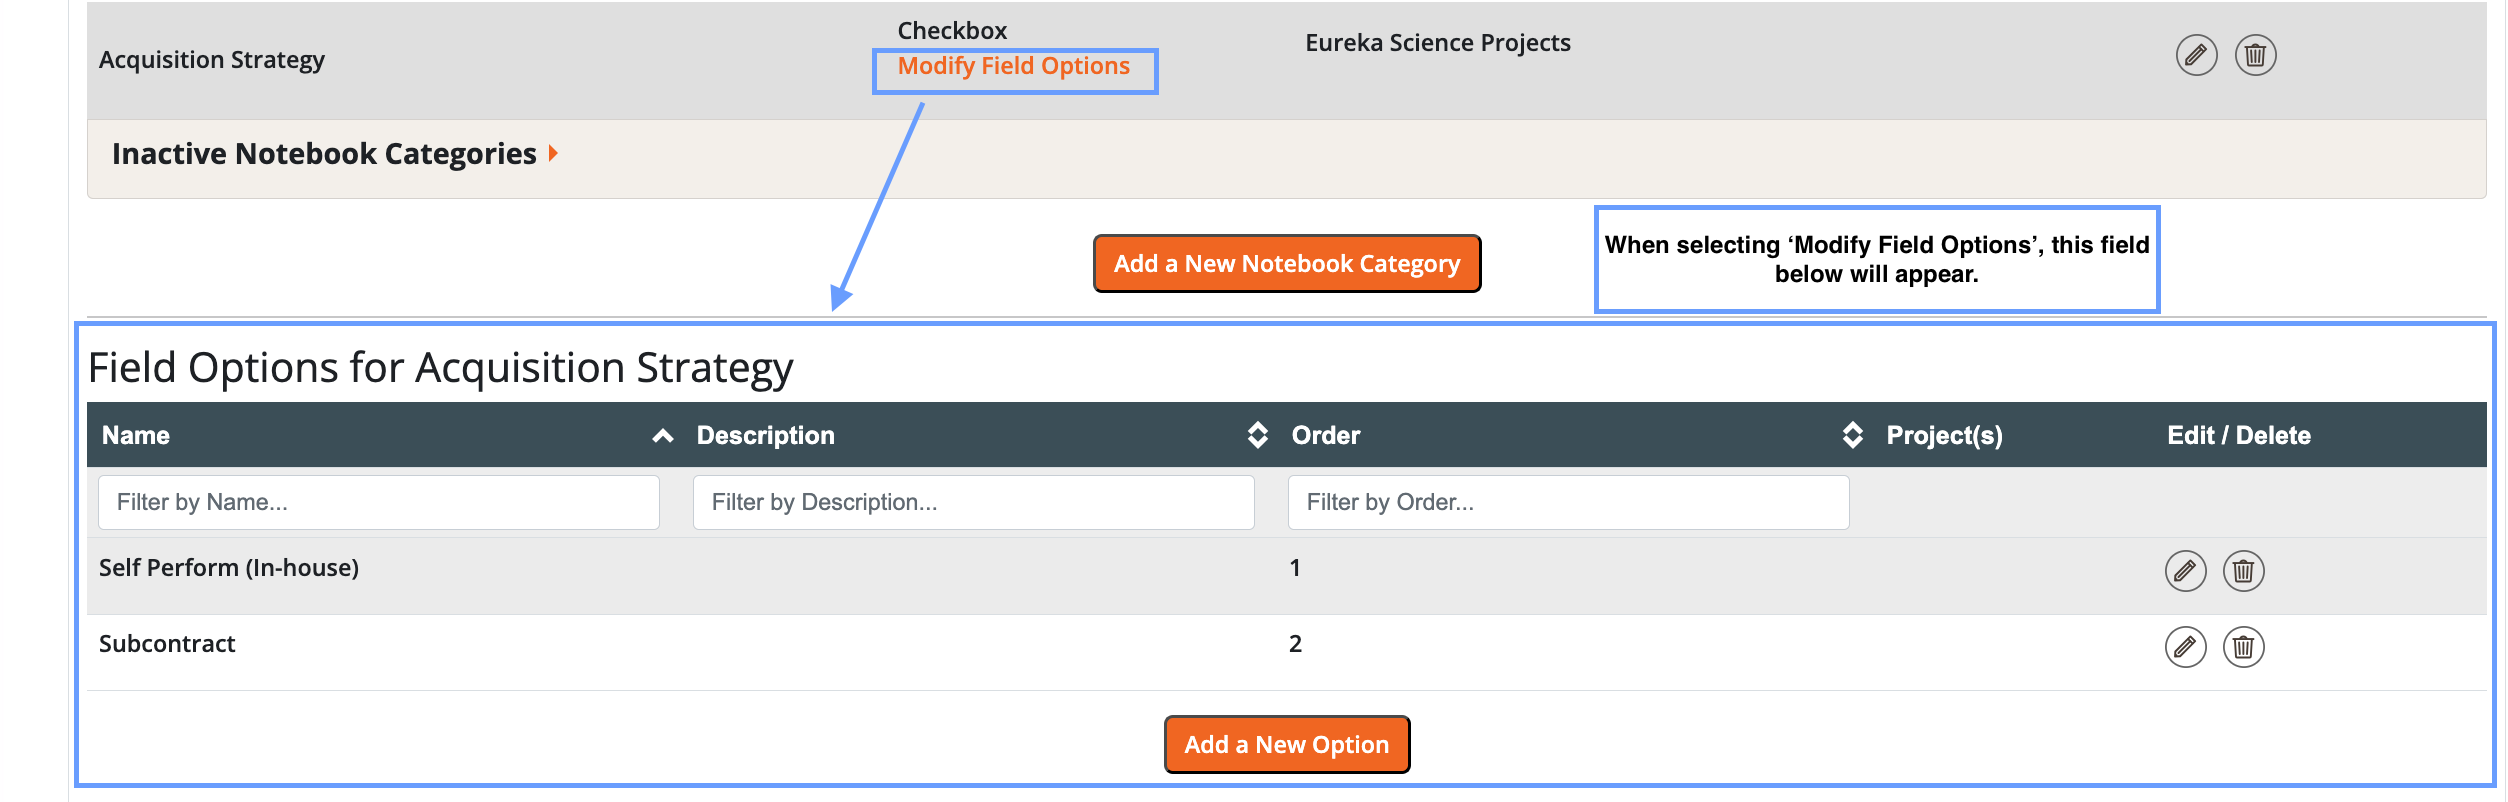
- Select the Modify Field Options to adjust options within that field.
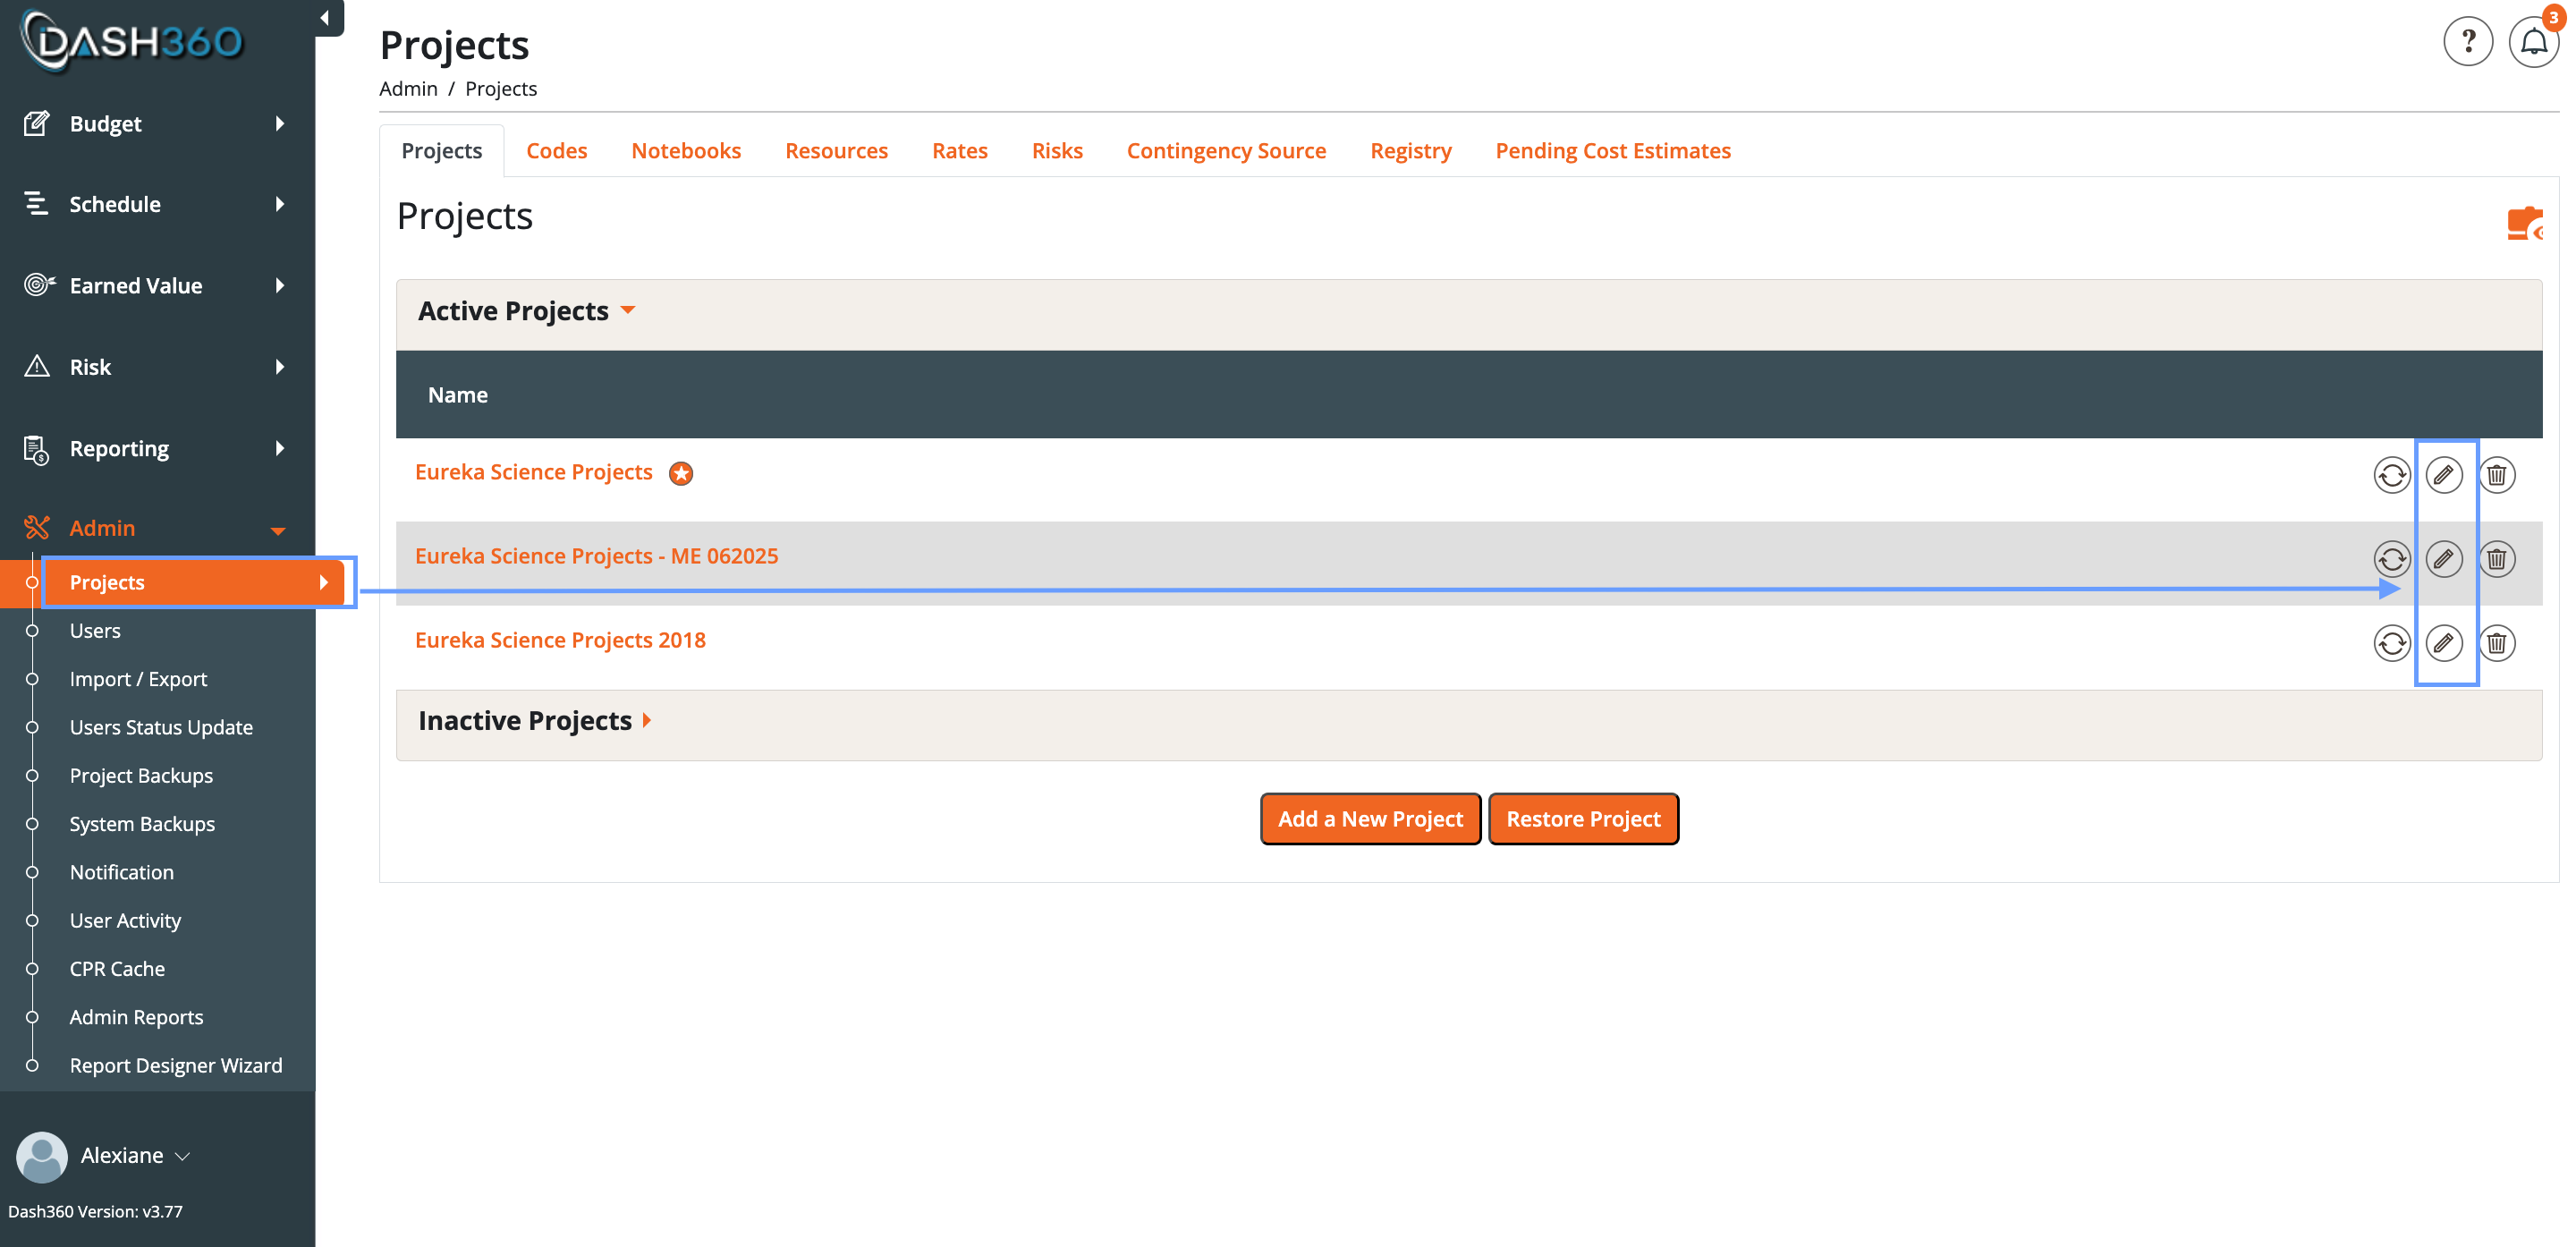
- Assign to a Project:
- Edit the desired project by clicking the pencil icon.
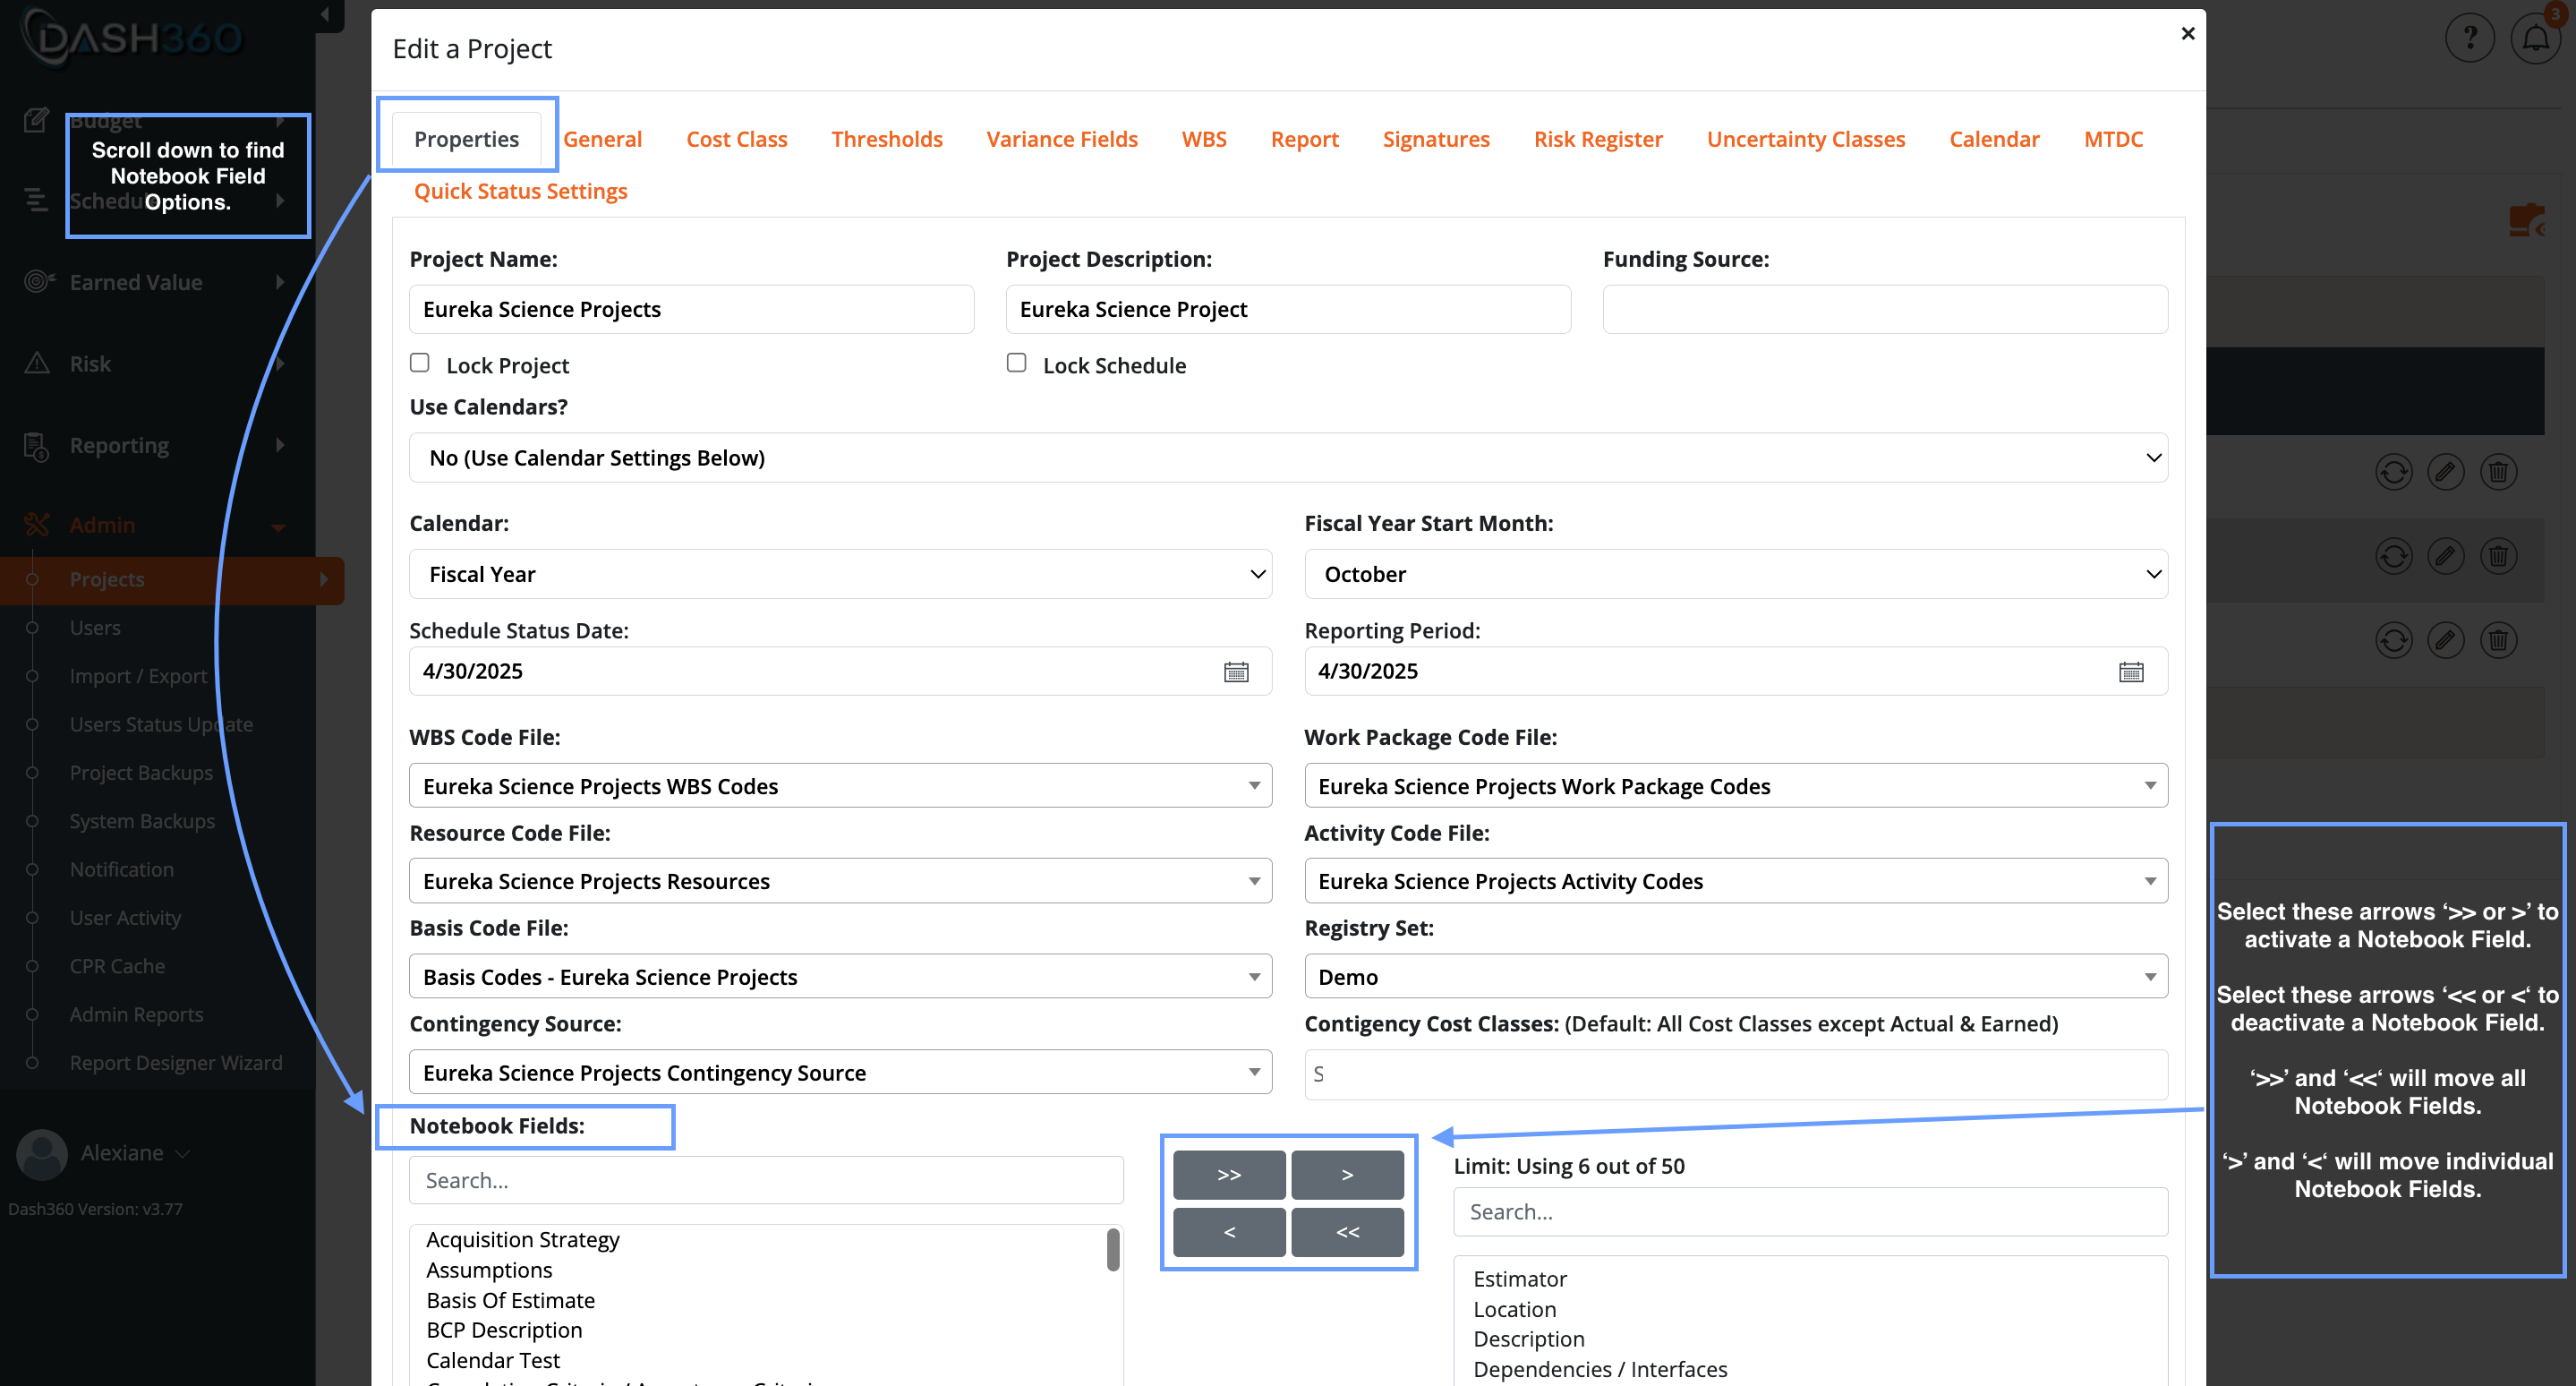
- Select Properties, then choose where to assign the notebook field.
- First level (Notebook Fields).
- Resource Assignment Notebook Fields.
- Risk Register Notebook Fields.
- Move the fields you want from the left list to the right list to activate them.