Table of Contents:
Uploading Resource Assignments Overview How to Prepare the Excel File How to Export Timephased Data How to Fill in the Exported File How to Check/Set Resource Codes How to Enter Descriptions Clearly How to Upload This section outlines the steps for uploading resource assignments to the Budget Form using Dash360’s Timephased Data Import/Export feature. The process includes exporting the appropriate template, entering or updating data, verifying that resource codes match system requirements, and uploading the file back into Dash360. Completing these steps accurately ensures each cost is assigned to the correct resource, supporting organized and up-to-date budget tracking. If resources are not set up in Dash360, you will be unable to create resource assignments. A resource assignment is identified by its resource code and linked to a cost class (typically Budget or Actuals). Contact a Dash360 administrator to have the necessary resources configured. Administrators can access the resource configuration settings by clicking here. How to Prepare Your Excel File:- Organize and clean up your Excel sheet for easy use.
- Make sure Resource Codes in Excel match those used in Dash360.
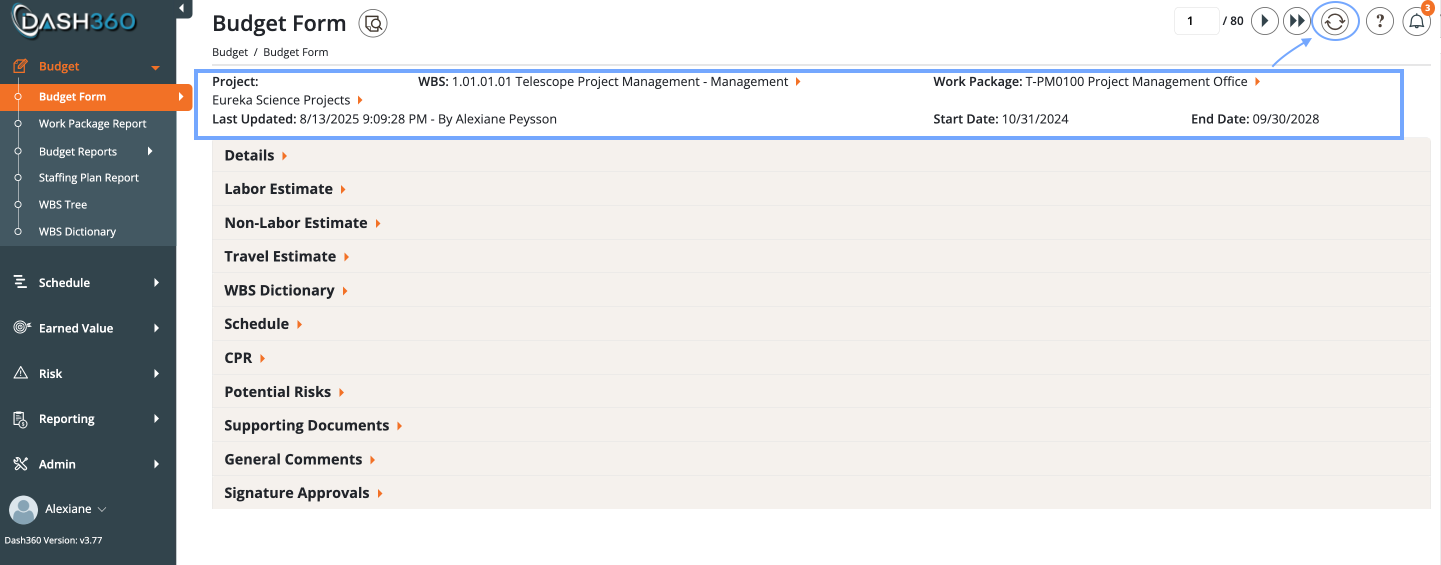
- In the Budget form, ensure you are selecting the correct Project, WBS, and WP.
- You can export Timephased Data regardless of whether you already have data in Dash360.
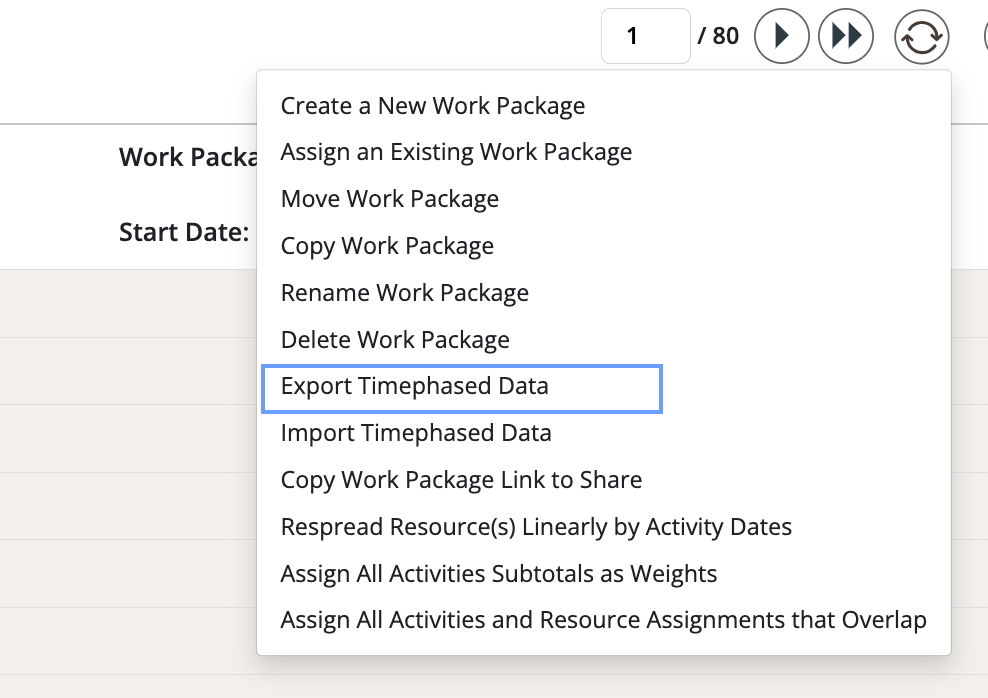
- If you have existing data you would like to use, click the process wheel (top-right next to the Help button) and select “Export Timephased Data” to download it.
- If you do not have existing data, use the same process to export the file template in the required Dash360 format for upload.
- Select which resource result you would like.
- Dash360 recommends using FTE or Hours for labor, Units or Direct for non-labor, and Trips for travel. However, you may select any resource result as needed.
- First Result is the top-listed resource result in your Resource Calculations for a given resource code. Selecting this option will display whichever resource result is listed first for that code (e.g., FTE, Direct, Units, ETC.). If you are unsure how Resource Calculations are configured, check with your administrator.
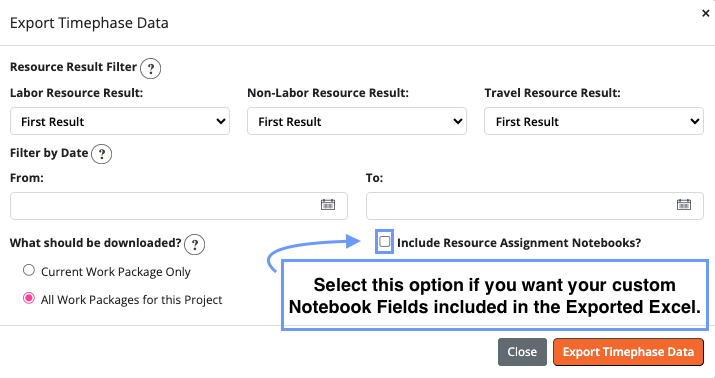
- Filters:
- You can filter by date when exporting data or you can filter by work package.
- Copy and fill in all columns in Exported Excel Sheet.
- Start/Finish Dates: Keep the same value all the way down the column.
- Timephased values run horizontally across the row (left to right), not vertically down the column.
- ID Column:
- Adding a new estimate: Leave the ID blank (Dash360 will assign one).
- Updating existing estimate: Keep the existing System ID unchanged—otherwise a new record will be created.
- Deleting an Estimate: To delete a Resource Assignment, leave the ID as exported and set the Delete column to Yes.
- Do not modify any System IDs in Dash360.
- If you copy a row to use as a template (for a different cost class or a similar resource assignment), remove the ID before uploading so it’s treated as new.
- Make sure each Resource Code exists by checking in “ResourceLookups” tab on the exported Timephased Excel.
- If it is missing:
- Contact your Admin about adding a new resource code.
- If you are an admin, click here.
- Can use category name as the default description.
- Can include if there are multiple payments for estimate: Specify it as (e.g., “5 years @ $5K/year”).
- Once everything is confirmed and cleaned, upload the file back into Dash360.
- Go to the Budget Form and click on the process wheel (next to the help button in top right).
- Select import Timephased Data.
